This is valid for Blender from version 2.8 until the current ones. The old versions were limited to 32 channels, but from ver. 3.0 they increased that to a maximum of 128 channels, which is a great improvement.
So, in reality, you don’t have to add any channels, because there are a lot of them already there.
The way to see and access all the channels is you can scale the y scale as you would do in viewport (zoom in and out) using CTRL+ middle-mouse-button.
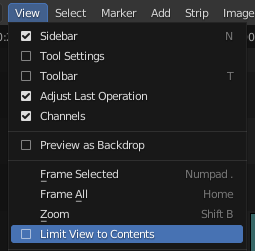
IMPORTANT NOTE: If it doesn’t work and you can’t see them by default, the view will often seem limited ‘to 7, 8 to 10 channels if ‘View’ > ‘Limit view to contents’ is checked.
Once deselected, you should be able to see as many channels as you like.
In recent years, public art has become an increasingly popular way for communities to express themselves and beautify their neighbourhoods. Mural art is a popular form of public art that has been used to transform drab walls and spaces into vibrant, eye-catching works of art.
Recently, a local art community from Reading in the United Kingdom’s Berkshire completed a mural art project that has captured the attention of residents and visitors alike. This is one of the many creative activities they have planned for the next future.
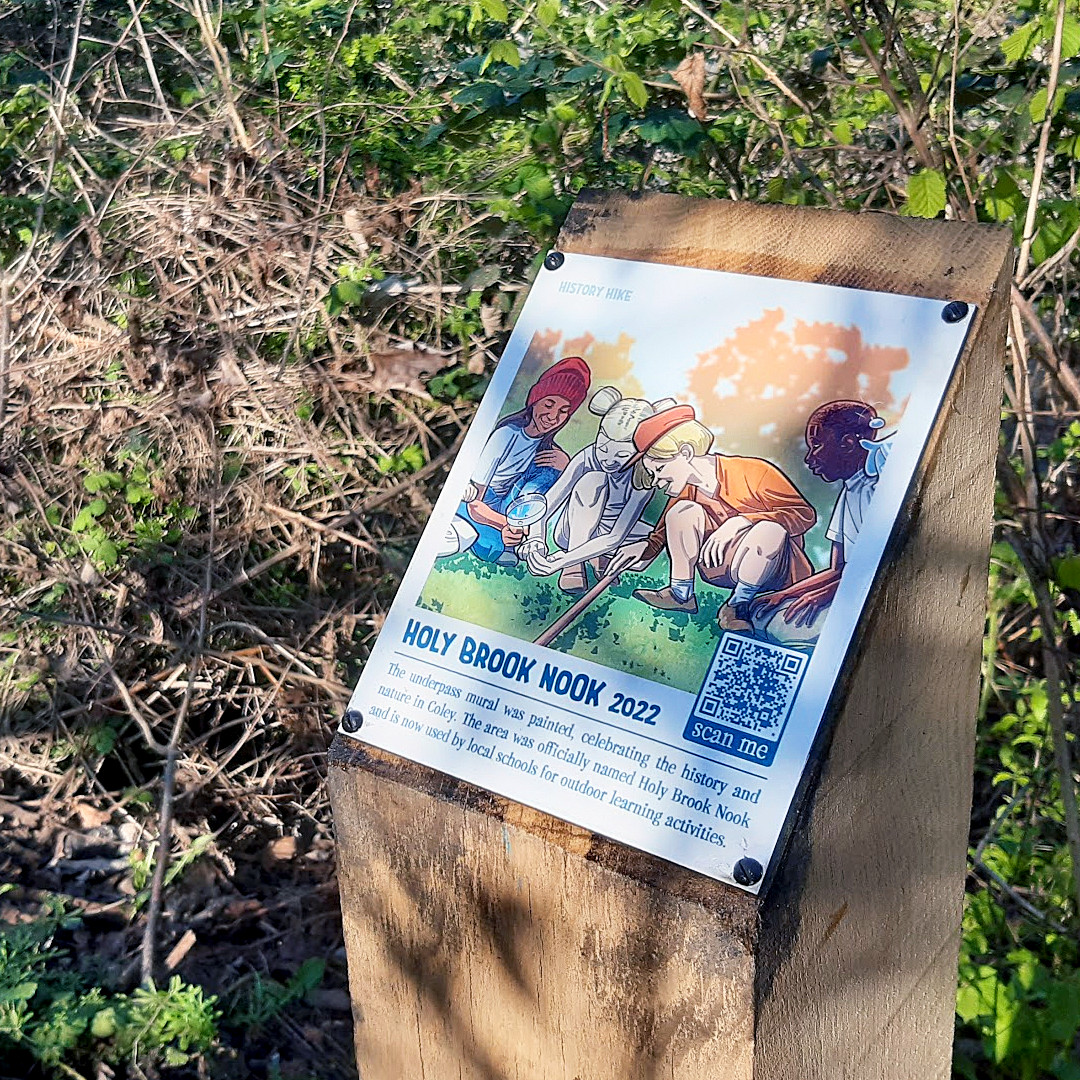
The Holy Brook Nook project was born at the beginning of 2022 when Natalie Ganpatsingh started putting the ideas for the project down on paper. Natalie is the director of Nature Nurture, an award-winning social enterprise whose mission is to engage the people of Reading with nature and the heritage on their doorstep. Natalie already knew a few great local artists from Commando Jugendstil and others from another project that they did in Reading – the murals of Reading Hydro – and was interested in including a public art component in her project.
They started discussing various ideas and together they understood how important that part of the project was, not just because of the art itself, but also for its potential to get the people living in the neighbourhood involved. So that way public art became – as it always does in our projects – a way to create community and to connect with the people of the town.
So this newly formed art community, consisting now of a bigger group of passionate artists and supporters, began the mural art project as a way to celebrate the town’s history and culture. The community had been looking for ways to revitalize the downtown area and believed that a series of murals would do just that. After many meetings, brainstorming sessions, and discussions, the artists came up with a plan for a series of murals that would depict different aspects of the town’s heritage and community.
At some point, they obtained some funding from Reading Borough Council’s Community Infrastructure Levy, which helped the project quite a bit, so a few months later, with the design for the mural ready and all the materials loaded on a small cart, they started painting the nature wall of the mural and the rest, as they say, is history.
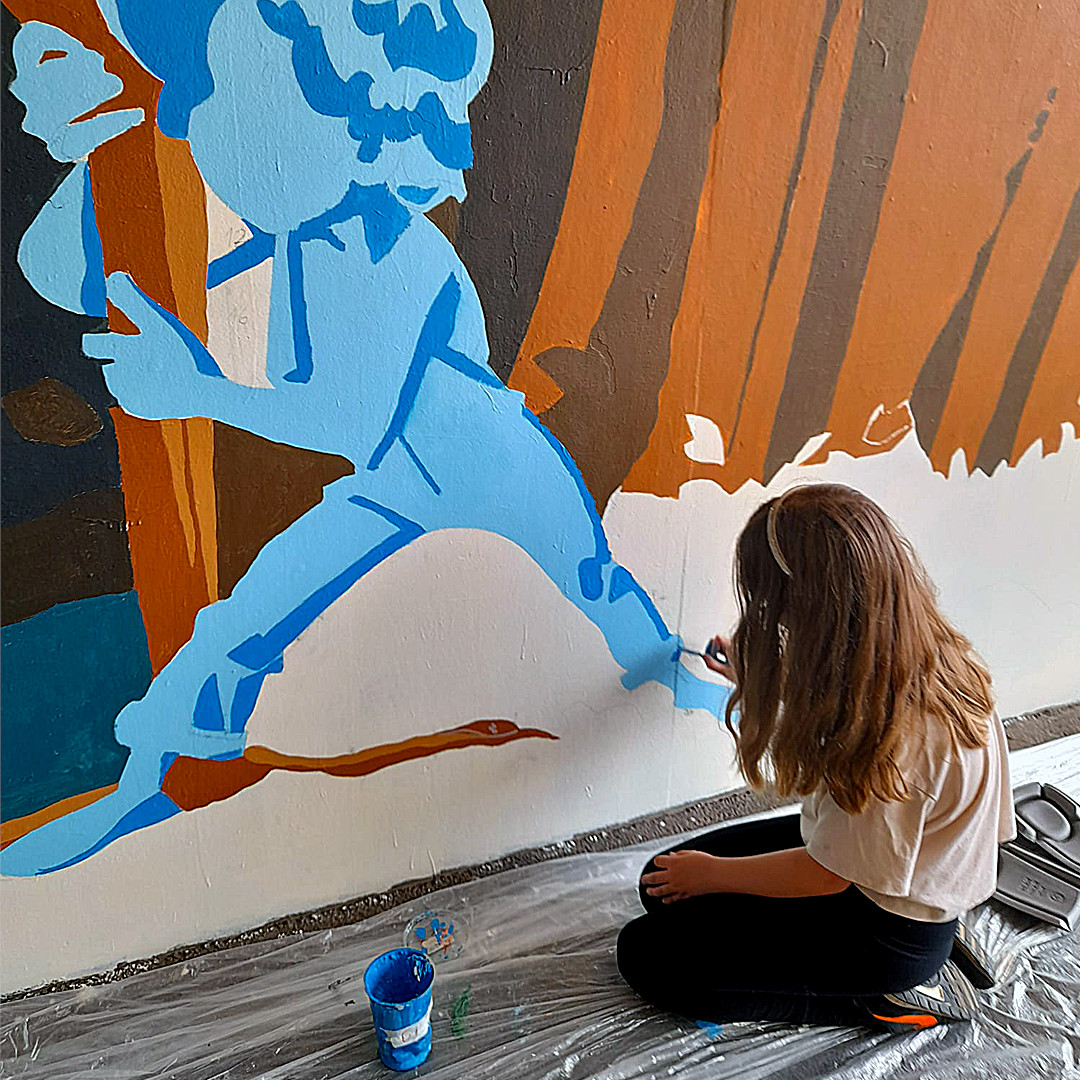
We watched their progress closely and were impressed by the speed and abnegation shown by all the artists and the rest of the volunteers taking part in the activities. We asked them to present their vision in a few words:
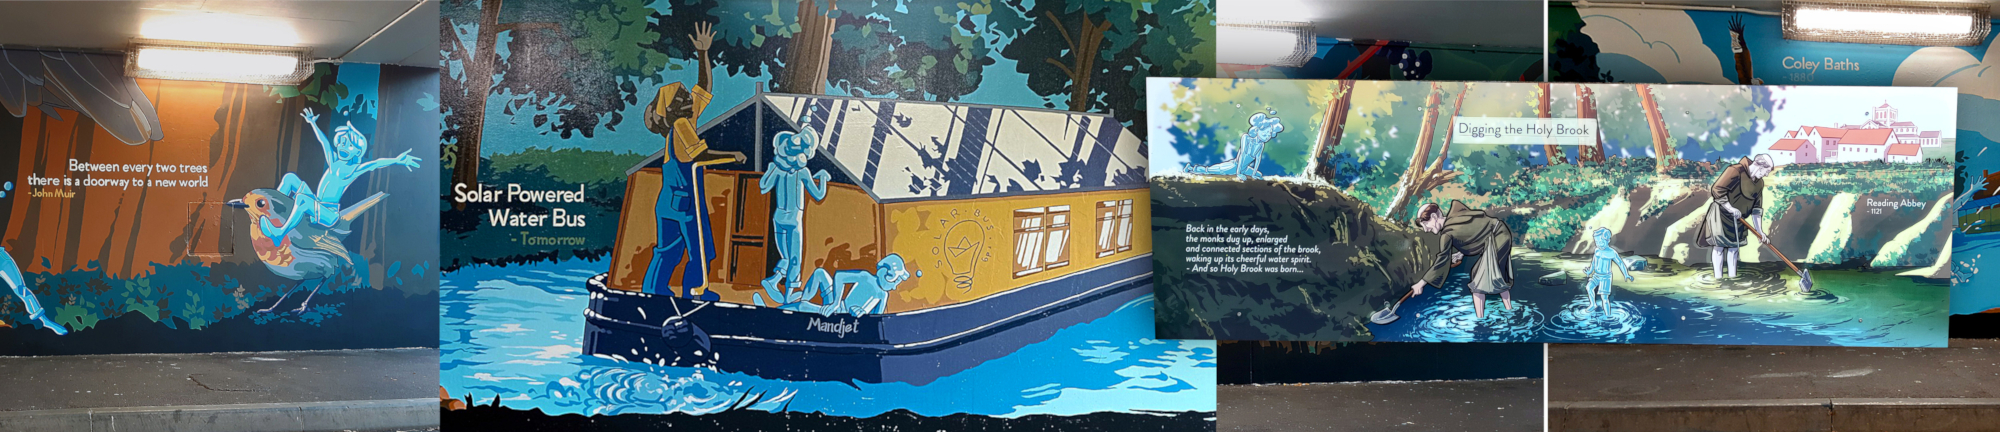
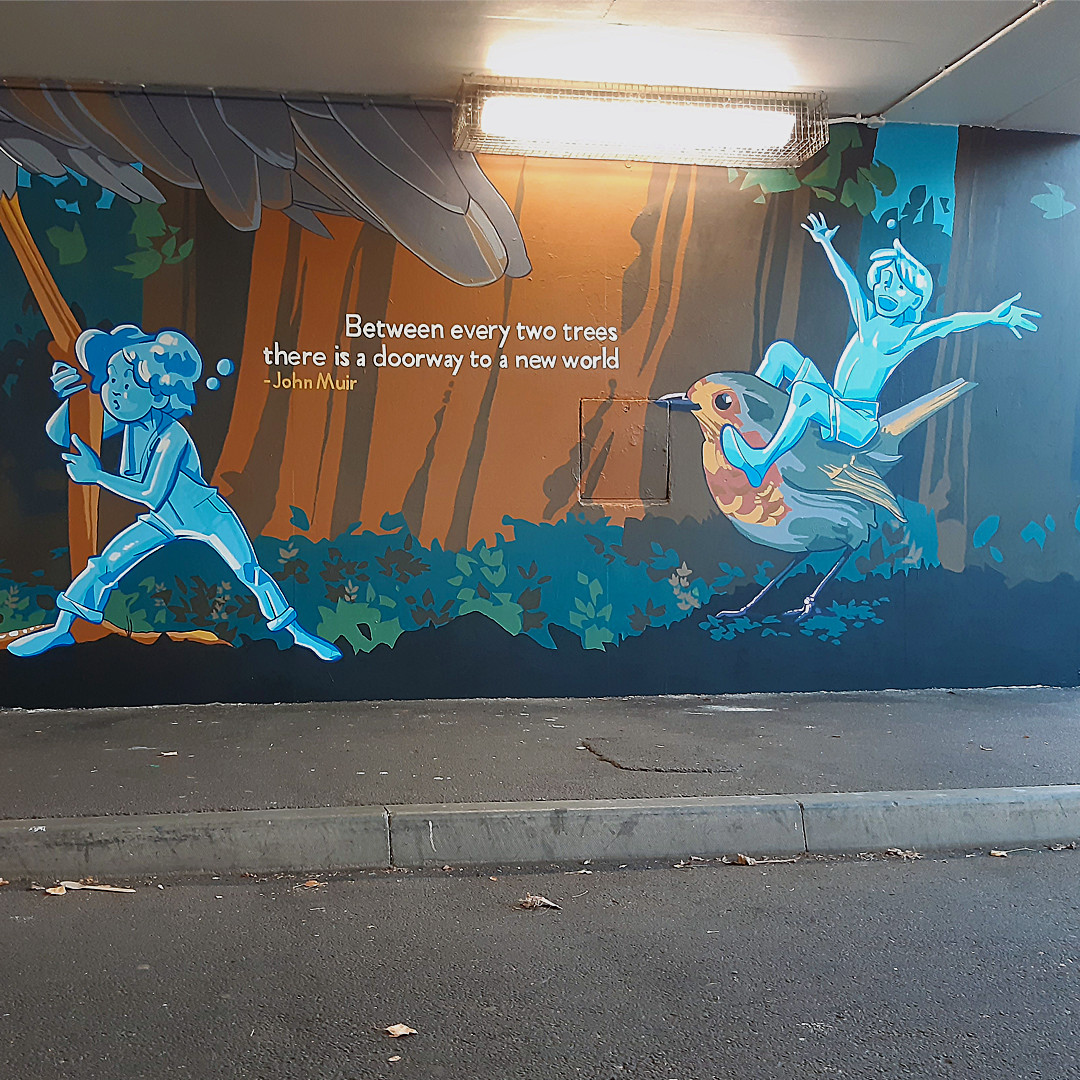
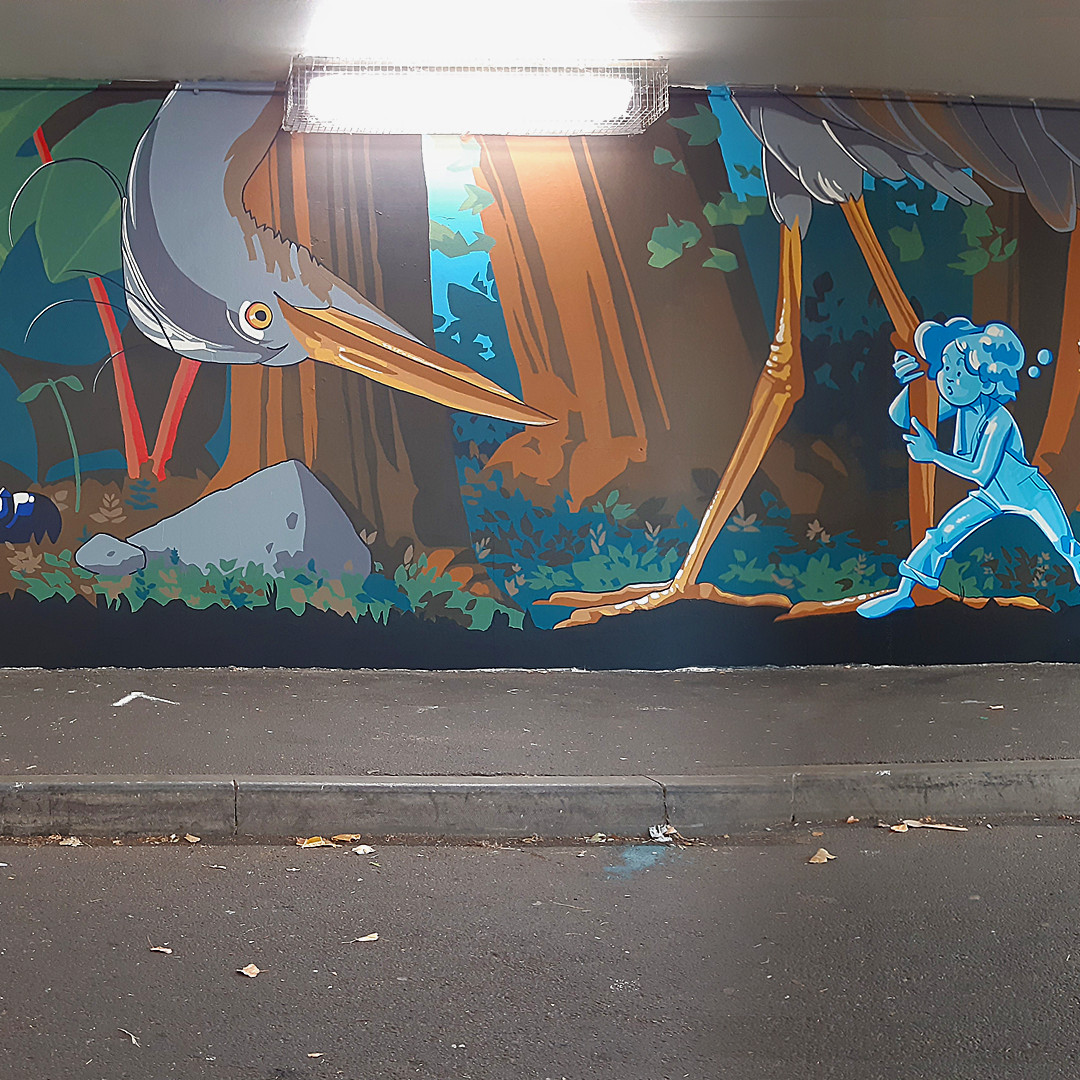
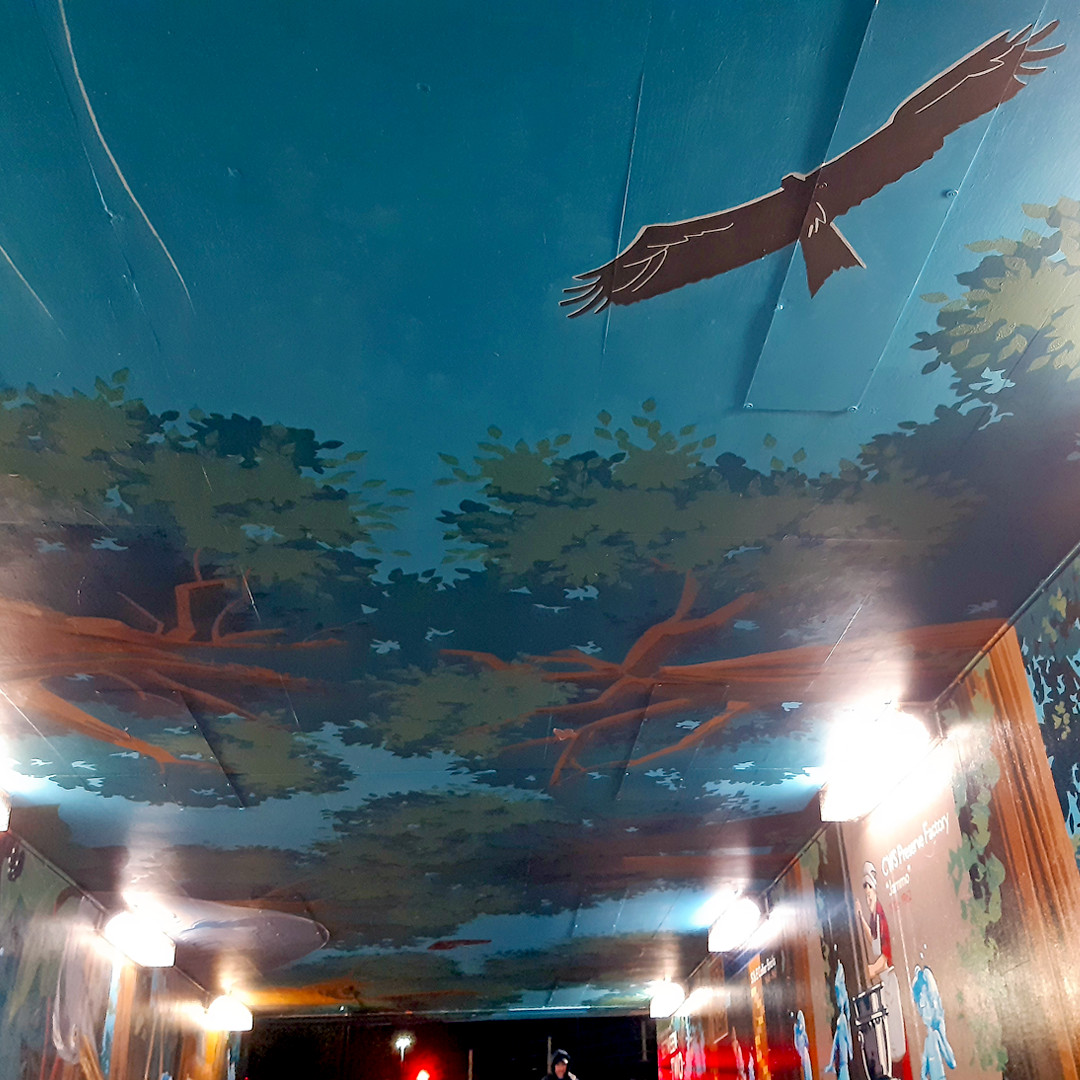
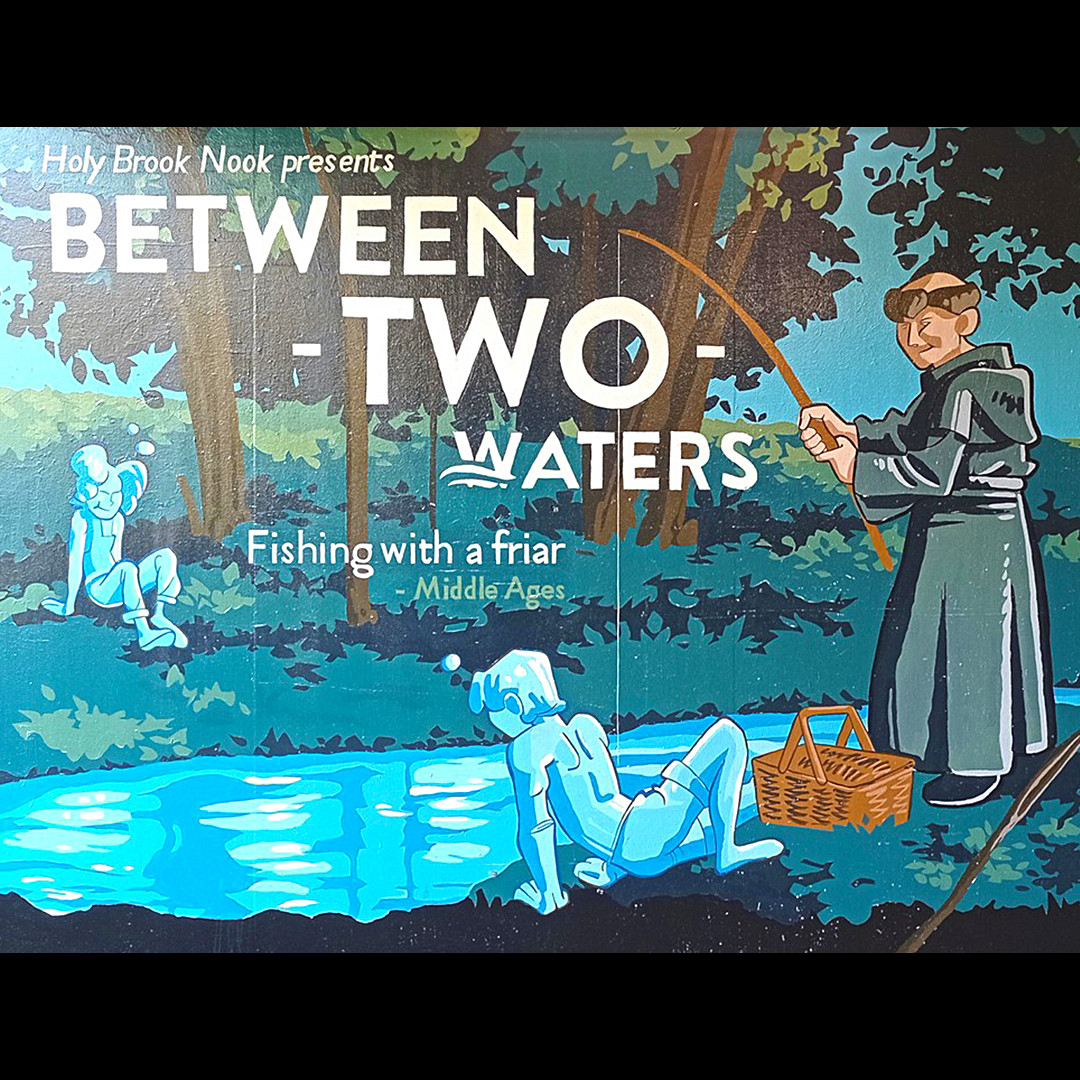
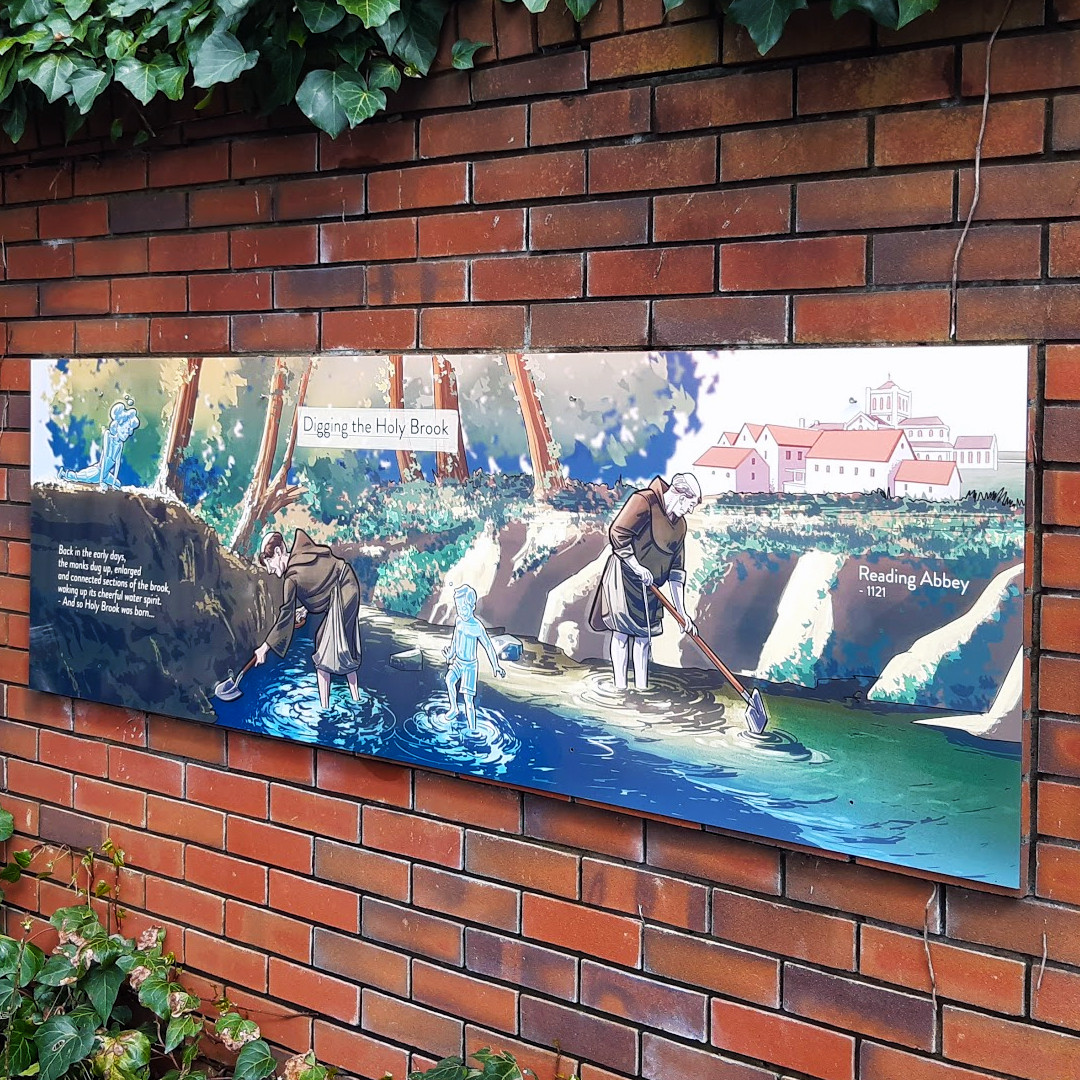
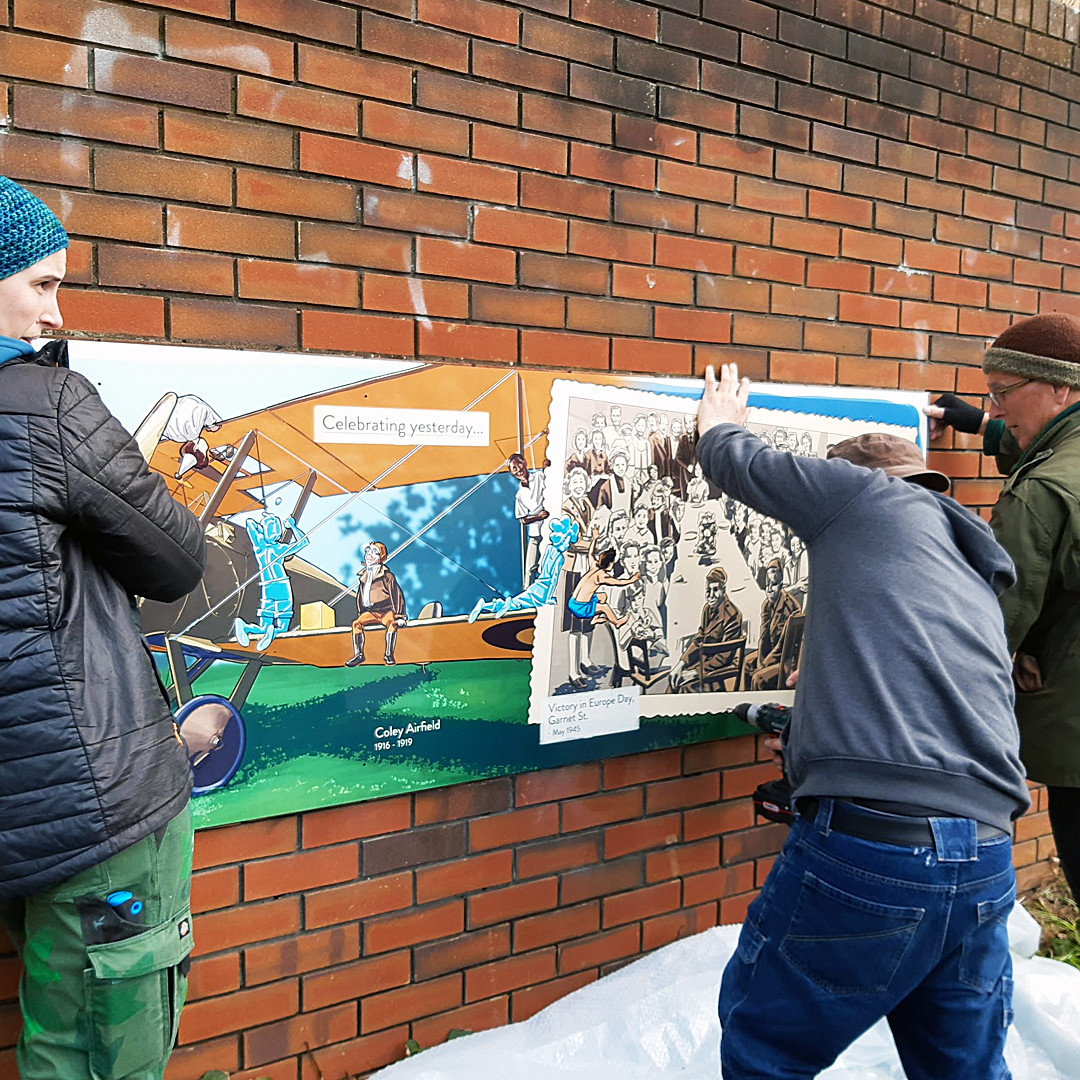
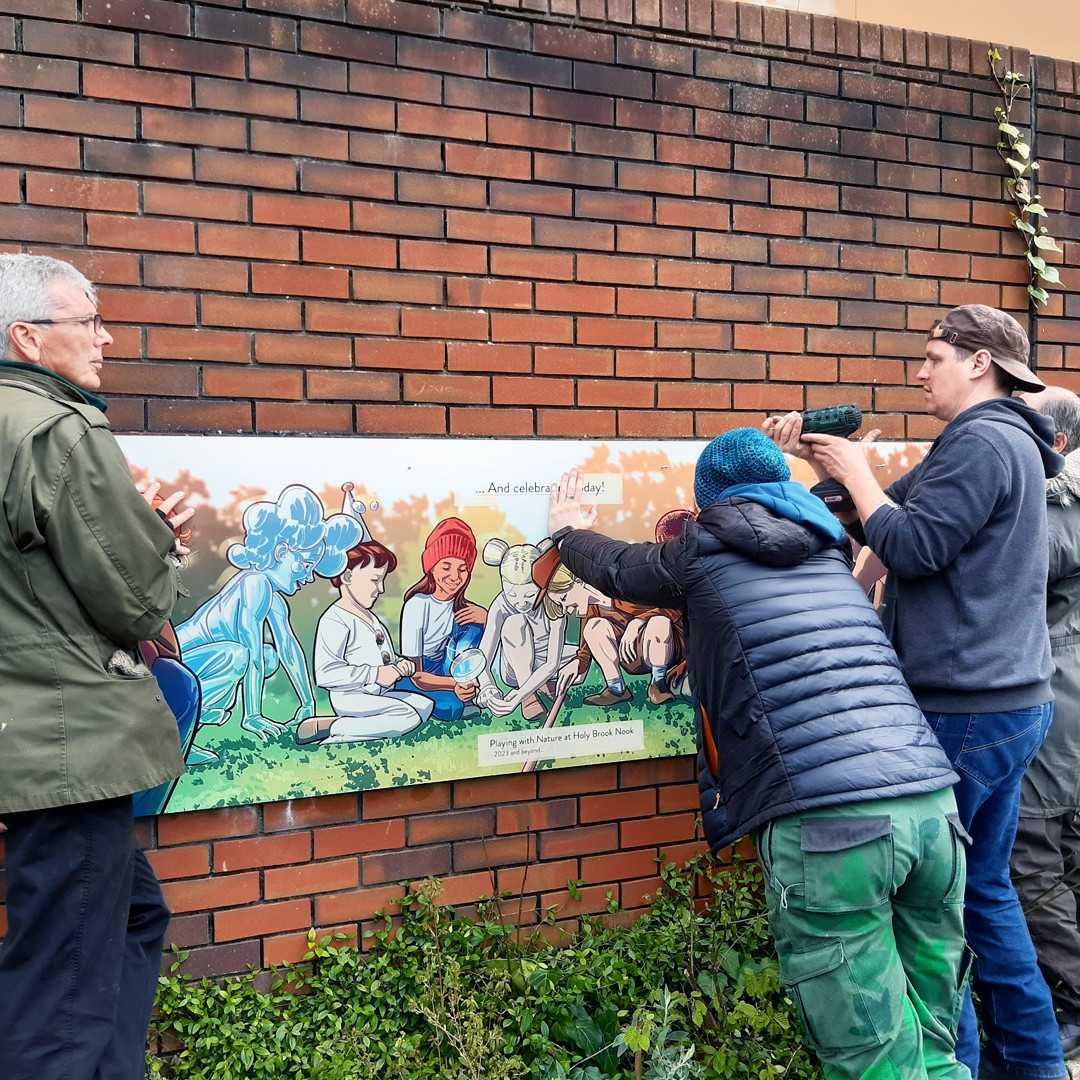
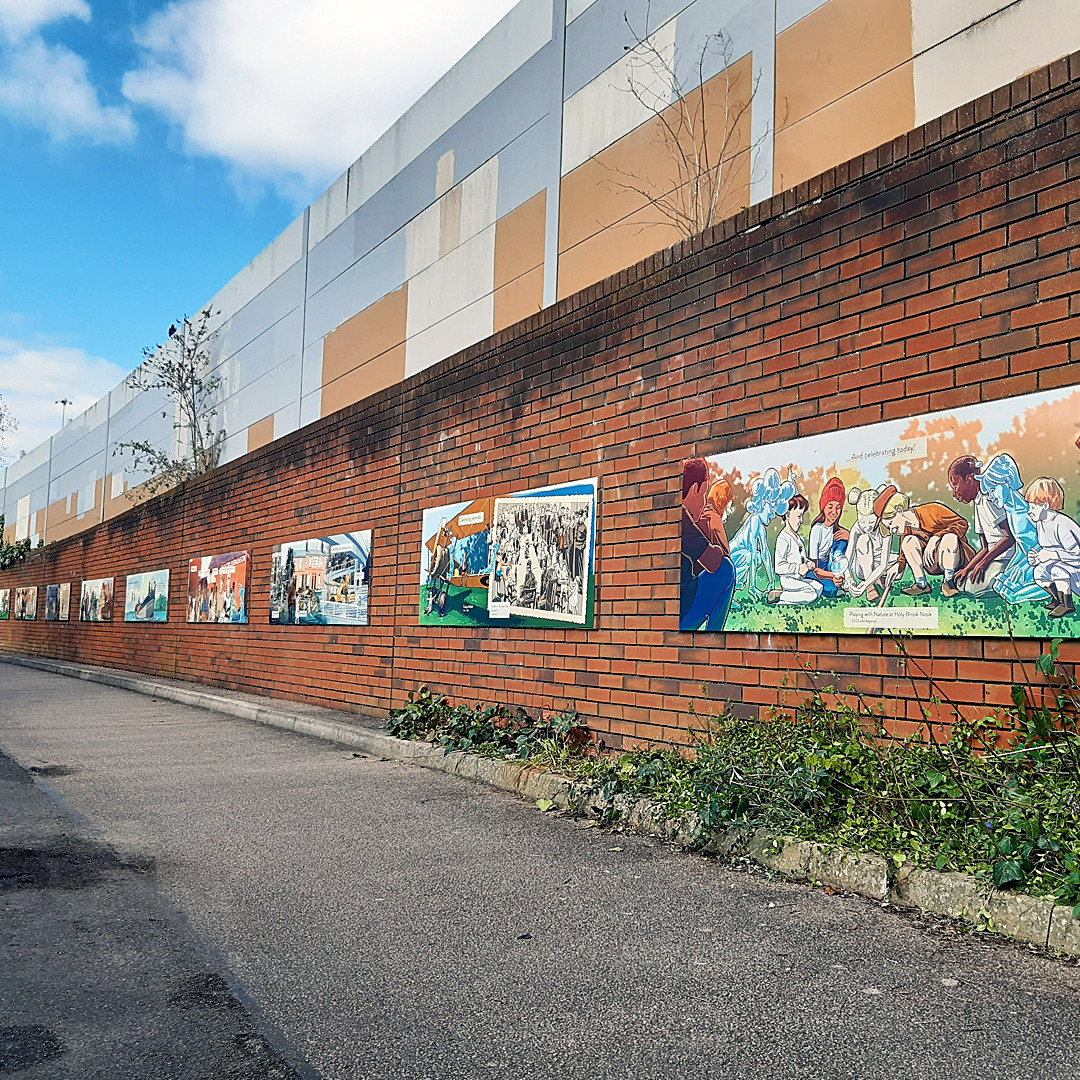
“One of our most ambitious projects is the creation of a 150ish square meters mural in the underpass leading towards Holy Brook Nook, an abandoned strip of land that has been converted into a green area for the kids of the local schools in the area of Coley, Reading (UK). Over 44 days of work, under any weather condition imaginable, and with the help of 56 volunteers we painted an original design that includes a wall dedicated to local nature, the opposite wall dedicated to local history, and the ceiling that merges the two scenes. The design sees the personifications of the two waterways that encircle the underpass, HolyBrook, and Kennet, walking and playing with the other characters or the environment. The mural is called Between Two Waters and is about highlighting the beauty of what we have in common and what we have built together.
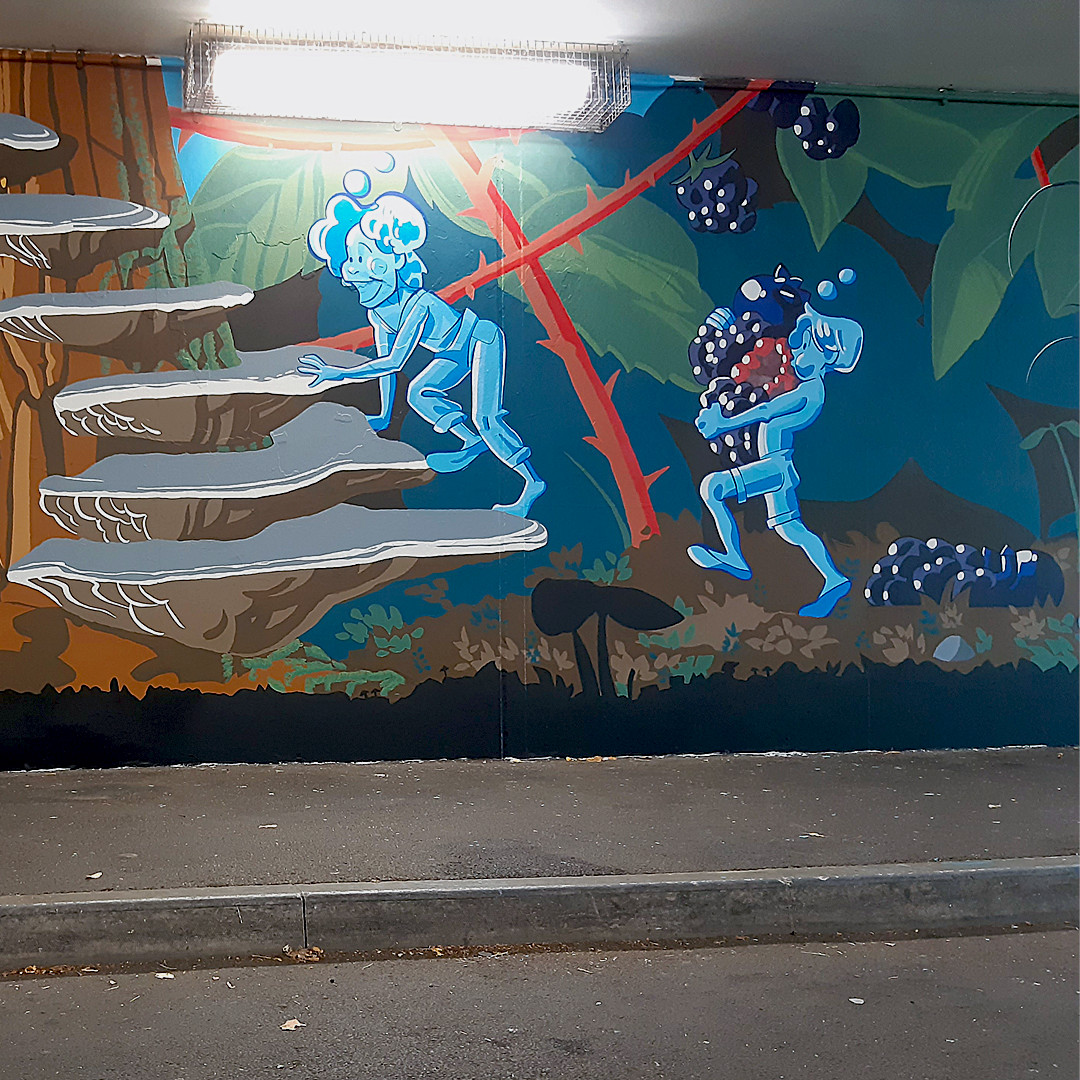
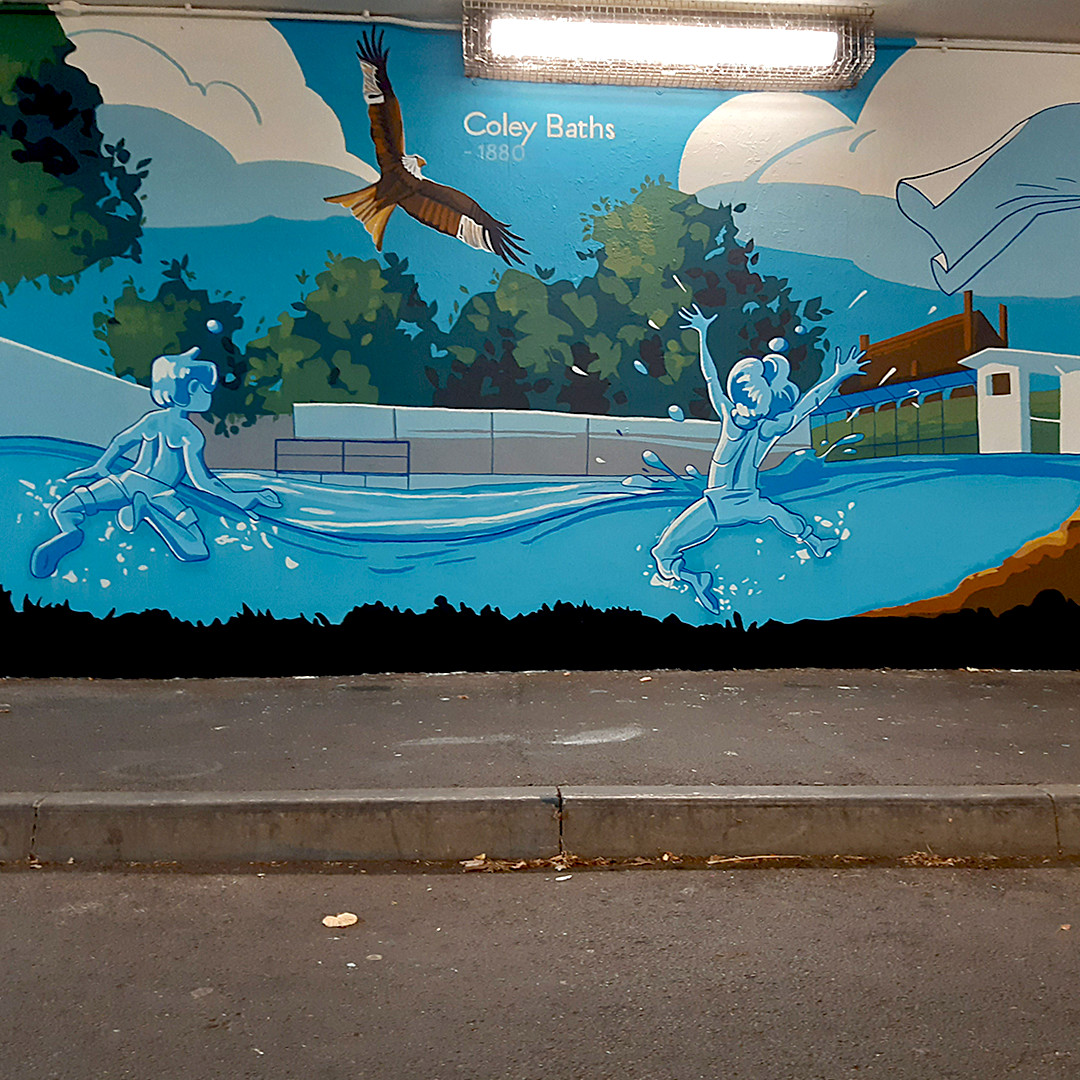
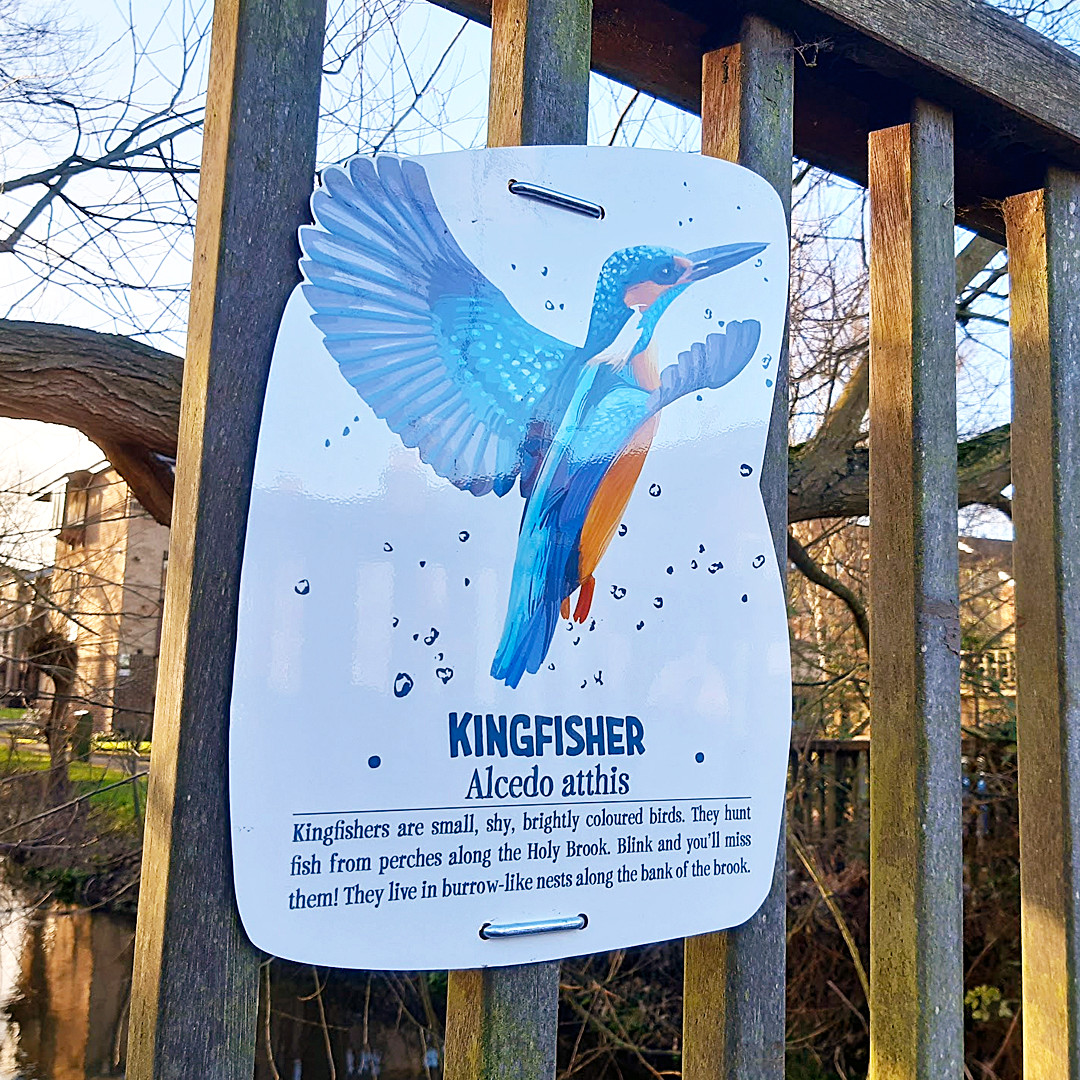
– On the nature wall you can see the characters playing with a robin and a heron, picking up some berries and climbing the bracket mushrooms of a tree (a nod to the Coley steps, a local historical feature now demolished), and then playing in the water in the Coley Baths, together with a red kite.
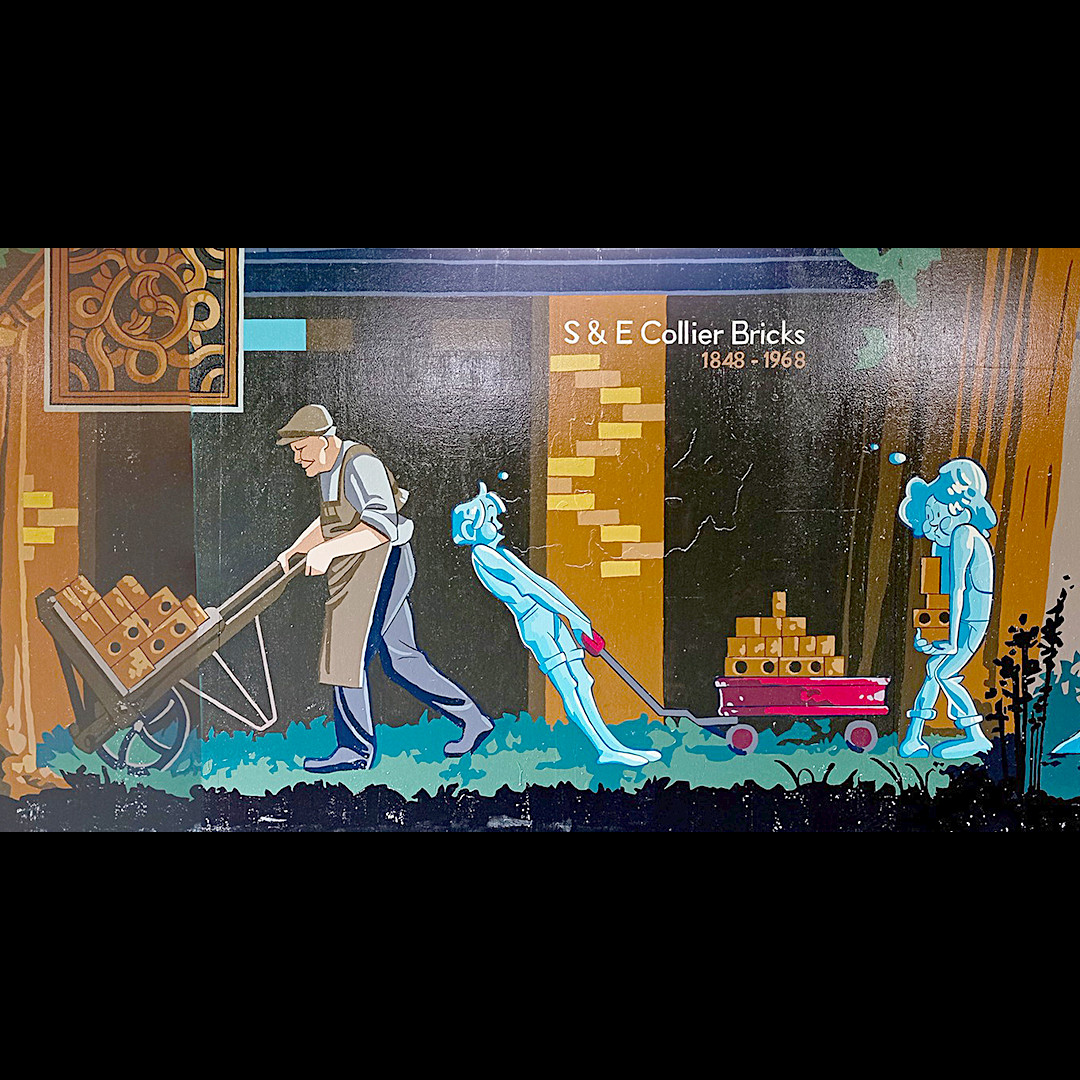
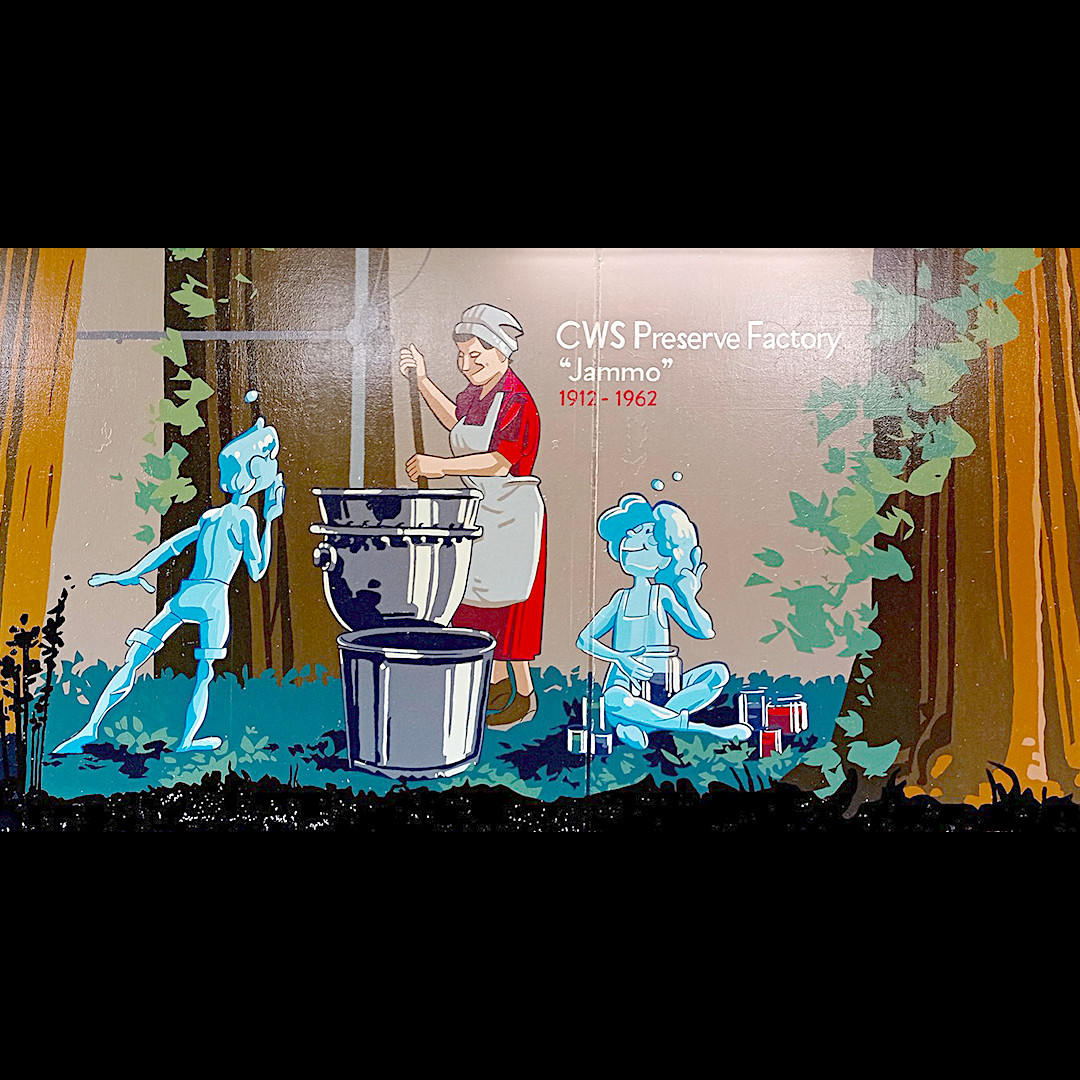
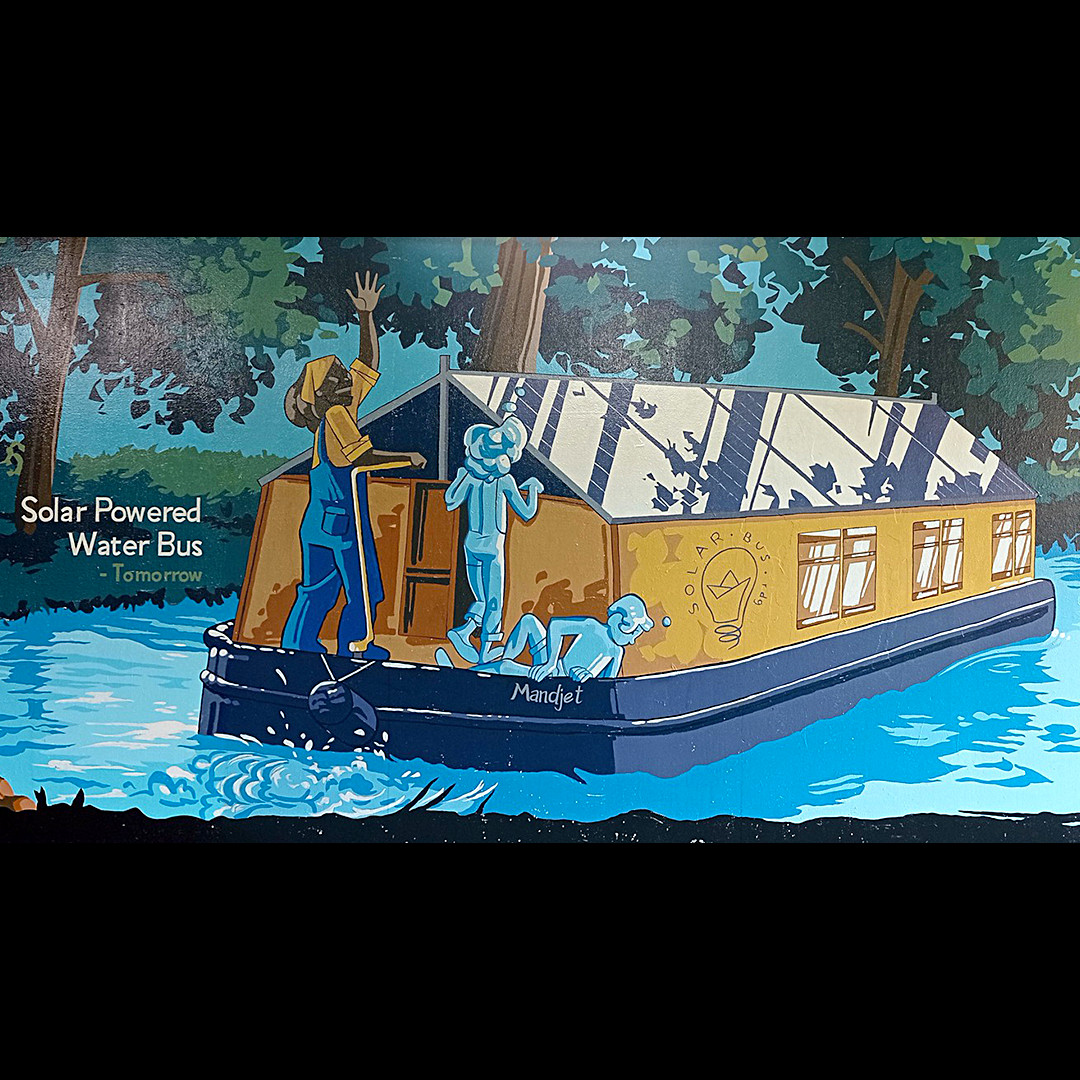
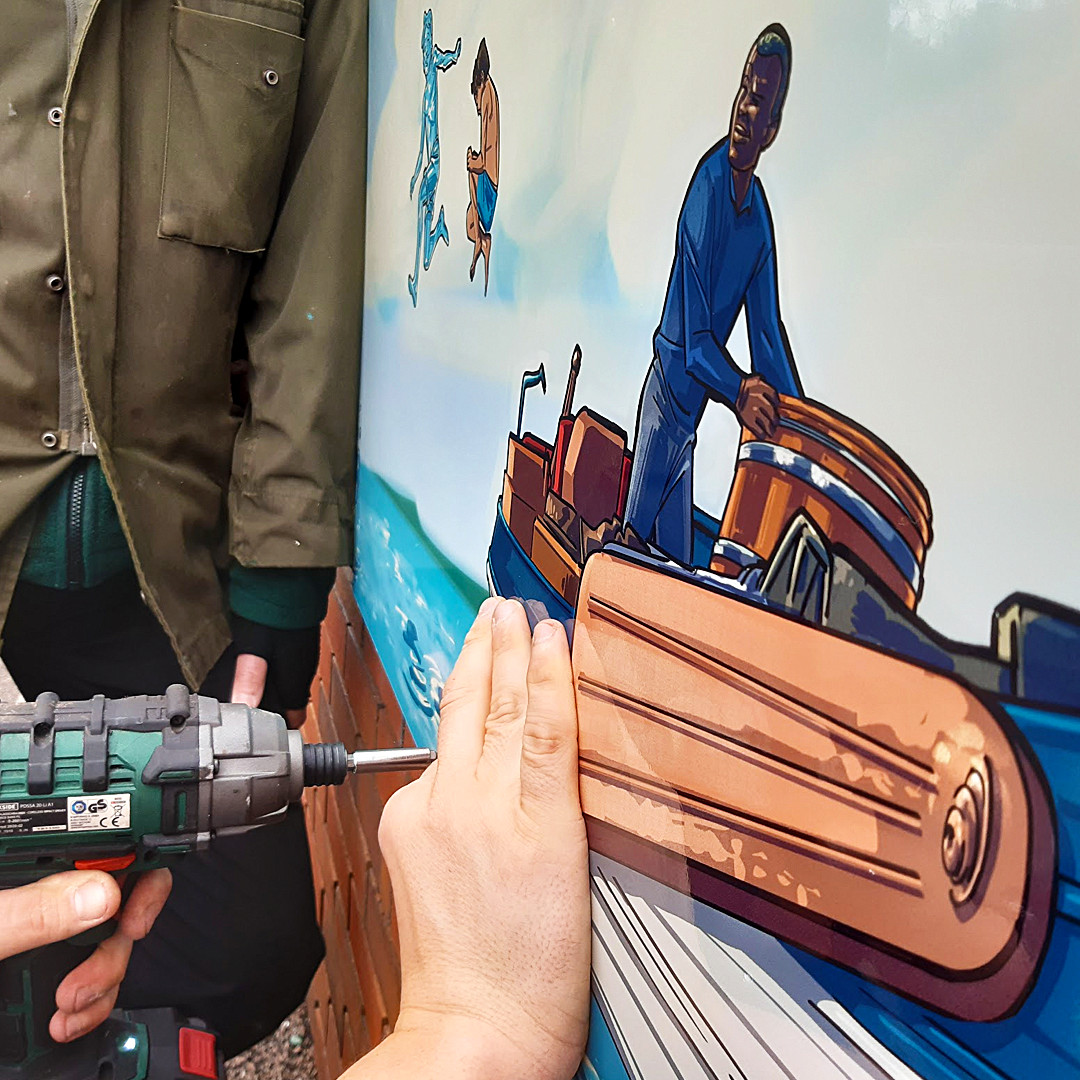
– On the history wall you can see the characters fishing with a monk, helping (with not much success) the local industries of the brickmakers and of the jam factory, and sailing on a solar-powered water bus, one of our visions for a sustainable future.
The feedback has been overwhelmingly positive, with locals turning into mural painters just because they felt a connection with the project. We had commuters, passers and kids modifying their route to work or school just to see the progress on the artwork. Elderly ladies and gentlemen were so kind to share their personal local stories, and donated books and brushes to help complete the mural.“
The success of this mural art project is a testament to the power of community and the value of public art. It shows that when a group of passionate individuals come together to create something meaningful, they can make a real difference in their community. This art community has demonstrated the impact that art can have in bringing people together, promoting local pride, and transforming public spaces.
The completed murals have been a hit with the community, attracting visitors from all over the region. Residents have expressed their appreciation for the way the murals have brought new life and energy to the downtown area. The murals have become a source of pride for the community, and they have sparked a renewed interest in public art.
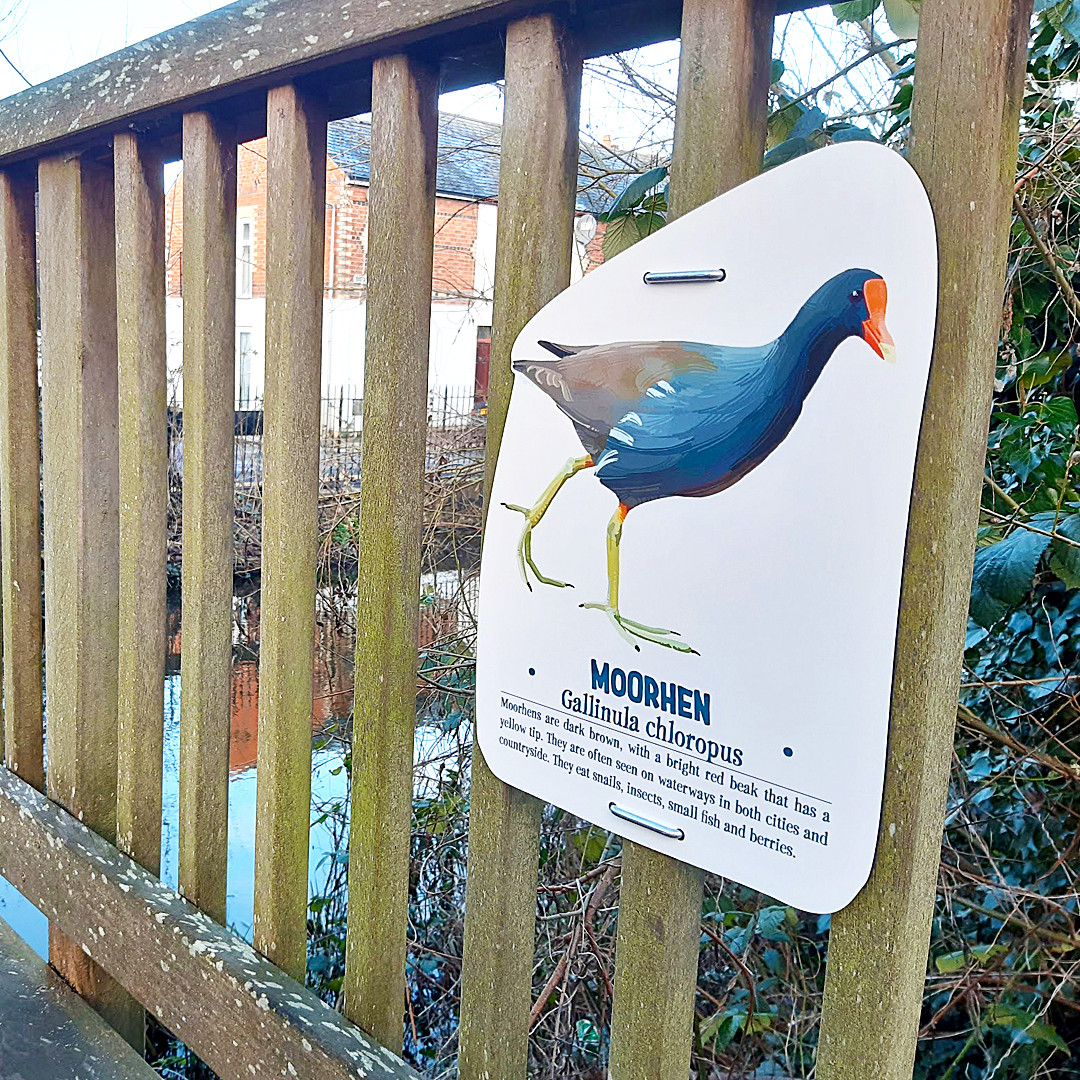
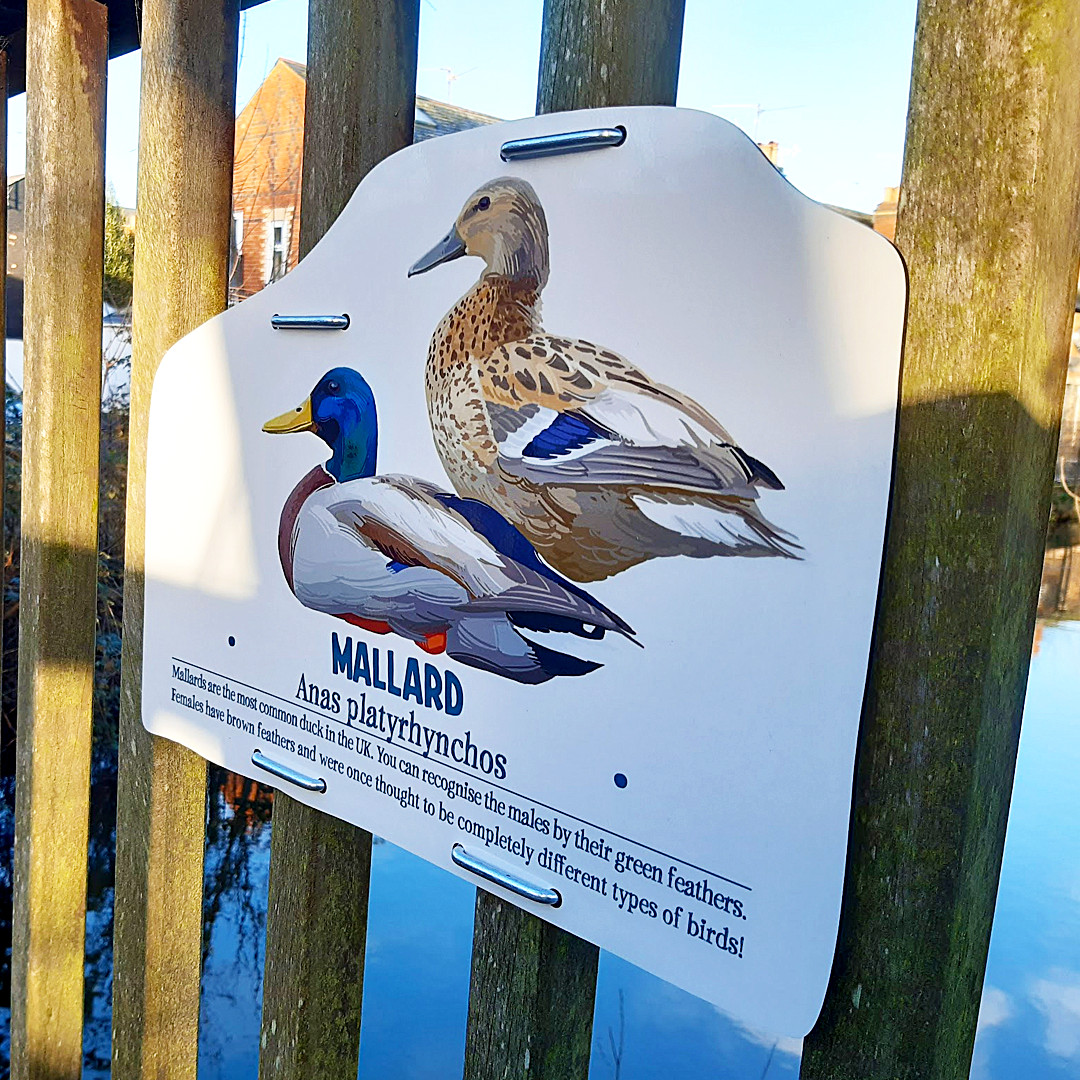
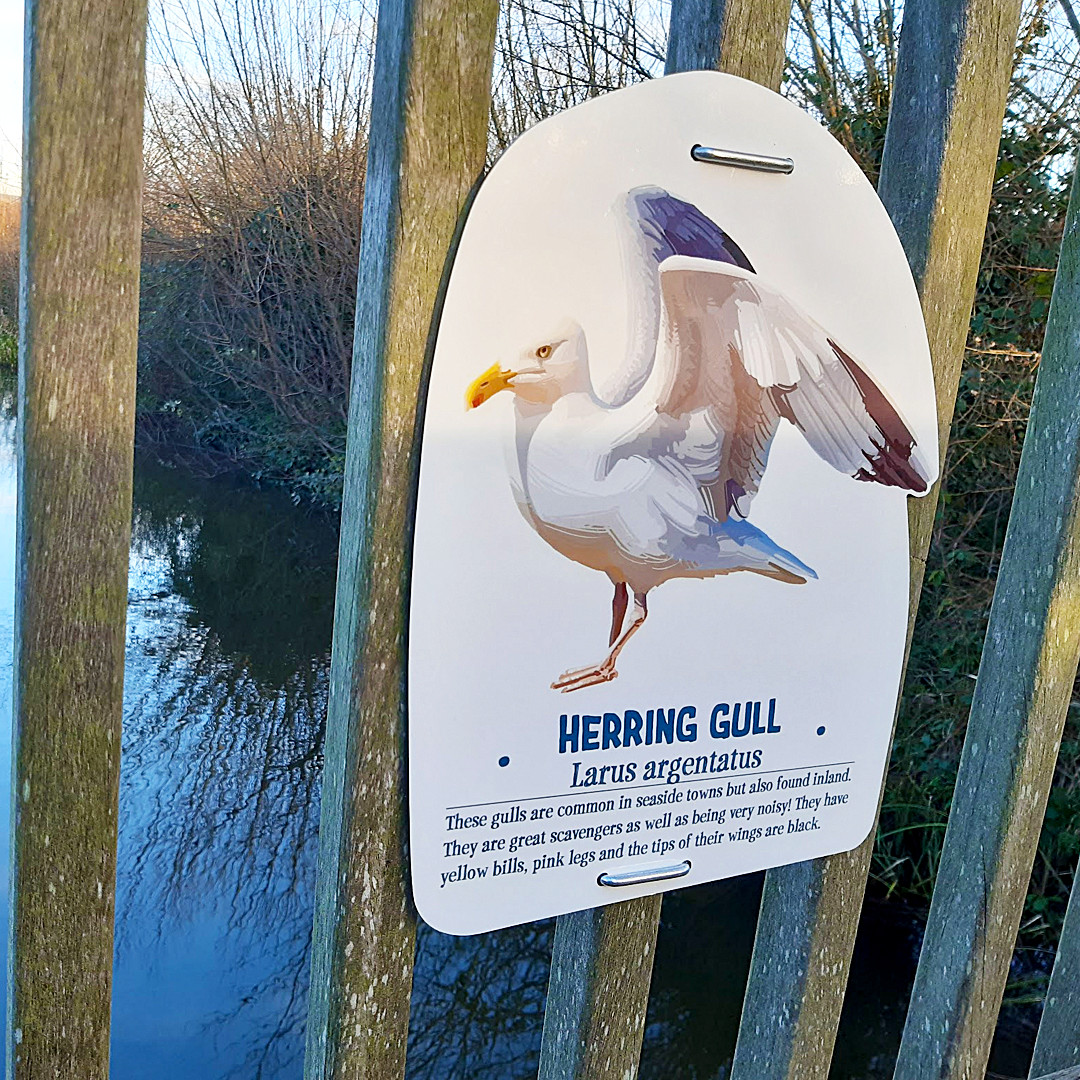
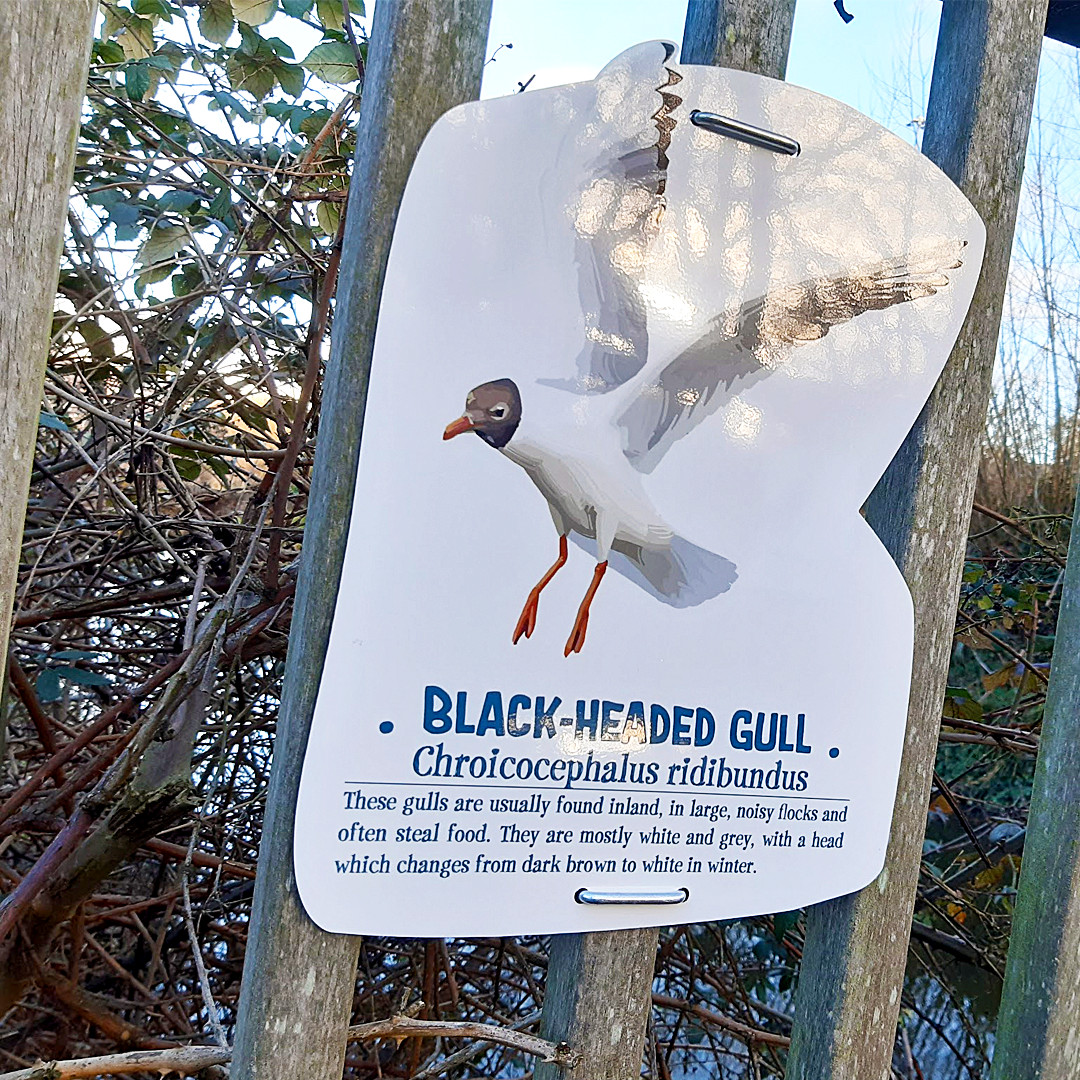
Besides that, it has to be mentioned that this mural art project is not the only one the community has in store. They are basically planning to reshape and embellish the whole natural area by cleaning the debris, posting useful wildlife signs, building all kinds of interesting floral and plant arrangements, and many more.
I think it’s important to mention some of the most important people that are involved and were the engines that pushed all the activities to completion. Natalie Ganpatsingh has been instrumental in the success of the project. Not just because of her responsibility, but also because she has been helping every time there was a little need or during all of the moments when we have been encountering obstacles.
Laura C Zanetti Domingues is a part of Commando Jugendstil, being one of the most active members of the collective, but she’s also been very important in the creation of the murals: some of the most interesting ideas that you can see depicted on the walls are hers.
We worked with a total of 56 volunteers, but David R, David N, Duncan, Ed, Adeline, Ruth, Tony, Joe, Gill, Gillian, Alex, Stuart, Beth, and Chin have been some of the most active persons that participated in the process of cleaning, preparing, painting and sealing the walls. We really can’t thank them enough for coming to the underpass to challenge hot, cold, and any other curveball that the UK weather was throwing at us.
A very interesting aspect I’d also like to touch on is that, as Reading can boast to be one of the most culturally diverse towns in the UK, so is the Holy Brook Nook project itself, gathering quite a few different nationalities in its midst, like Hong Kong, China, France, Romania, Bulgaria, many countries from the African continent and, of course, people from the UK (and some more Italians as well). It was really nice to witness all these different cultures coming together to create something beautiful and meaningful.
We will definitely come back in the near future to present the next achievements of this brilliant community initiative that brought so many people together, but for now, we’ve put together a video presentation of the whole “Holy Brook Nook” mural art project:
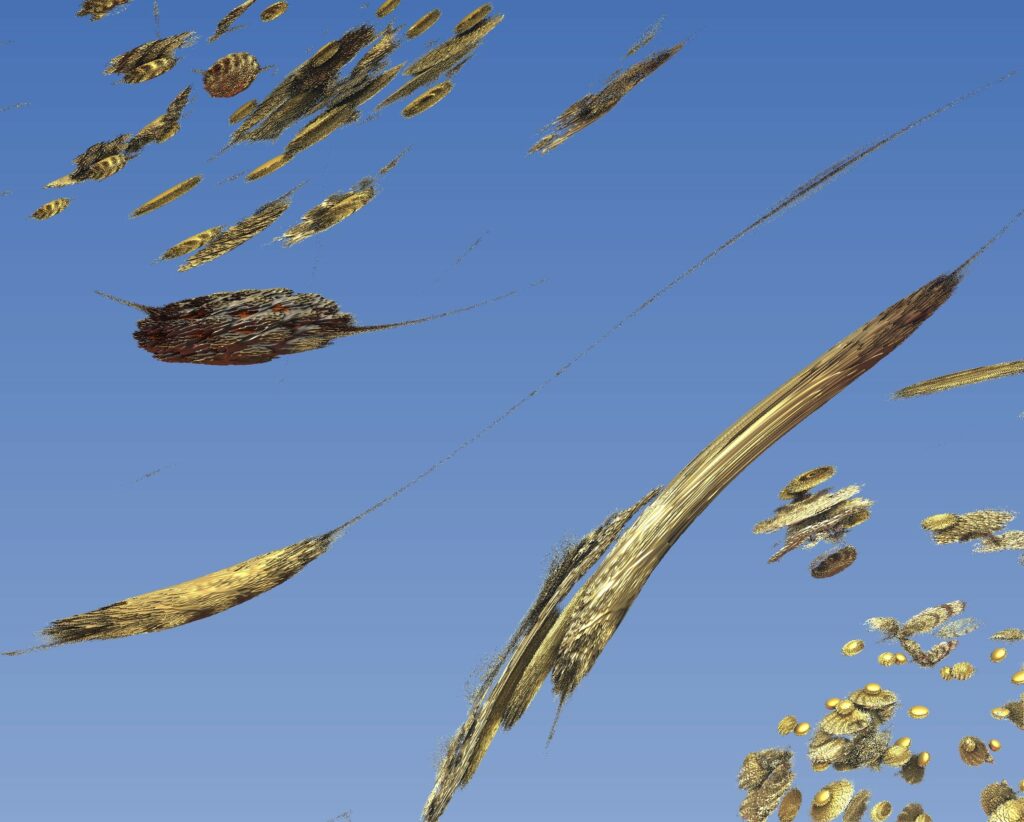
A collection with beautiful 3D evolving organic natural style abstract entities. This is the third collection item. The viewer can imagine anything this might be… 🙂
A collection with beautiful 3D evolving organic natural style abstract entities. This is the second item of this collection and could be a plant or fruit from another planet…
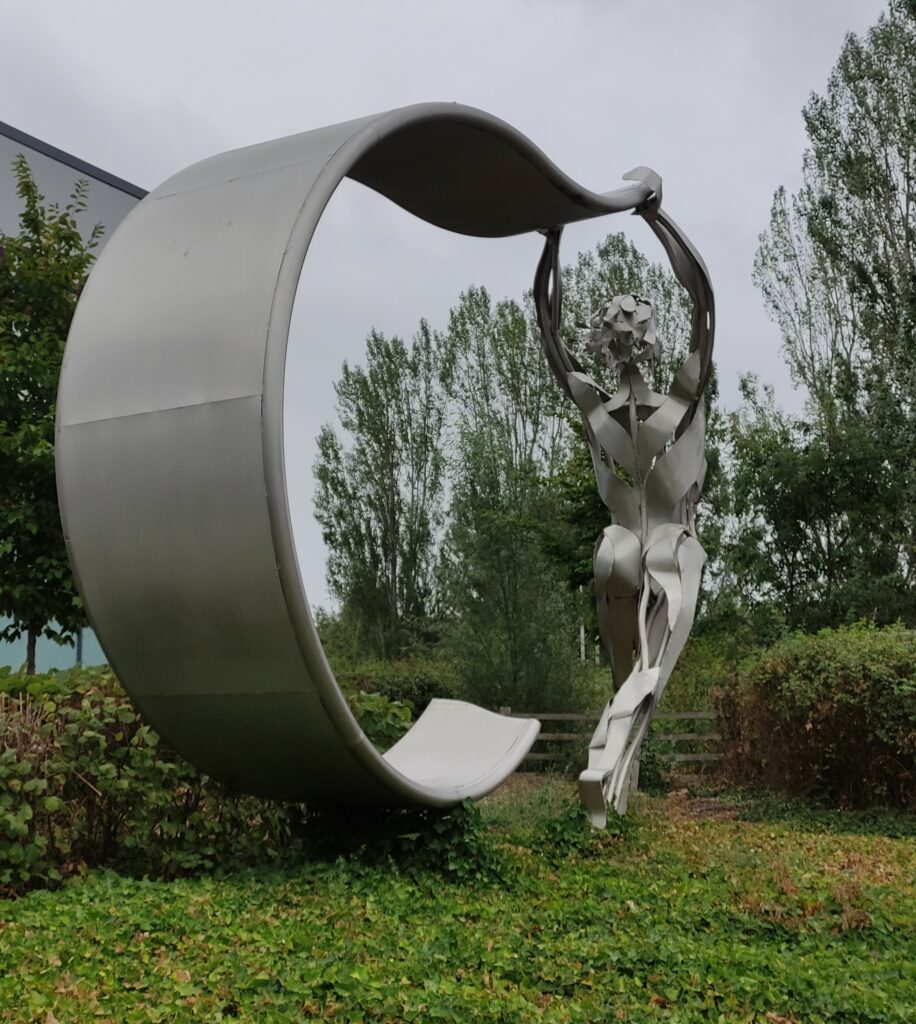
Herds of people are passing at full speed in their cars along the Reading International Business Park and, from those that are forced to stop from time to time at the traffic lights, I’m sure only very few notice the captivating metallic statue posted just next to the sidewalk…
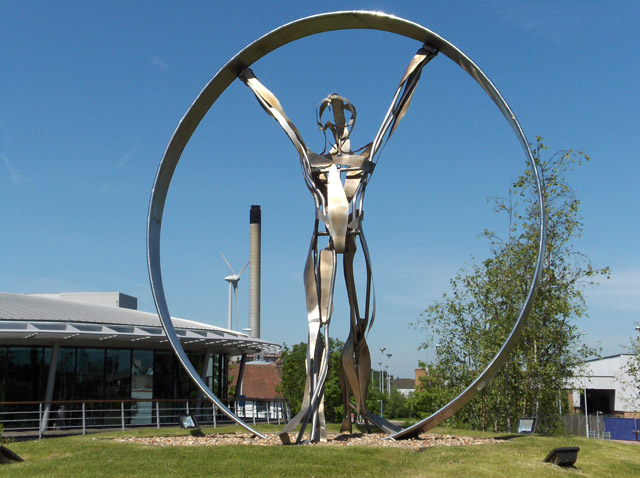
It’s a stylised metallic sculpture with a dynamic pose of a running sportsman holding a flag above her head. If you had time to stop and admire it, you would definitely appreciate the artistry, as it combines the modern with the classical styles and techniques that work very well together, harmonizing and complementing each other. The elegant lines smooth out the schematic construction giving the work a very special dynamic fluidity that just cannot go unnoticed even for the hurried eye.
I thought that an actual location map would be quite useful, so here it is below:
The weird part is that after a quick search I actually couldn’t find anything about the sculpture…
That doesn’t mean that my strong love of art didn’t prevail… It took extended research, but in the end I found out that the artwork is called “Flying the flag” and it was made in 2017 by the amazing British artist Clare Bigger.
From her website, I extracted a short description of her:
Clare Bigger is a figurative sculptor who captures the spontaneity of movement in her work, using stainless steel to create contemporary, fluid forms and to bring a lightness and grace to her sculptures. She exhibits internationally, producing both private and public commissions featuring her two passions: sport and nature.
Her childhood was spent in Africa and she has travelled extensively, both fuelling her appreciation and curiosity for the natural world. She also has a black belt in taekwondo, giving her an intimate understanding of movement which imbues her work with a dynamism, whether it’s a swooping bird, a dancer balancing en pointe, boxing hares or a sprinter in full flight.
It’s actually very surprising, looking at the quality of her artwork, that it’s literally not mentioned in any of the public Reading websites or the art-related ones I know or I could find on the internet…
I only found this piece of artwork, in the end, deeply buried in the artist’s social media profile – Clarebiggersculptures
In any case, I will continue my hunt for beautiful and useful things and will bring them forth to the public’s attention. 🙂 Please feel free to send me any interesting things you want and I will consider publishing them.
Interestingly, the artist has another brilliant work placed quite close to the one above, just a couple hundred meters, next to the iconic Reading International Business Park. For the ones that are interested, it’s close to the famous Reading Majesky Stadium as well. This one is called “Gateway“, by Clare Bigger and I will post that here too, but for the other work of the artist check out her website or social profiles I listed above.
I had to do this when I had a server setup with a lot of stuff, but it couldn’t be kept live for some time, so we tried to find a solution to backup and keep all the things for a future deployment without the need to go through all the painful installations and configurations.
As the server was a VPS and we had SSH access, I researched and stumbled upon this neat little tool: Rsnapshot
(The rsnapshot website: https://rsnapshot.org/) It seemed to do the trick, so I gave it a try.
So, on the source server, I logged in via SSH, then installed snapshot:
sudo apt-get install rsnapshot
Then you need to check/edit the config file:
vi /etc/rsnapshot.conf
In there, different from the web article, there aren’t “daily, weekly, monthly“, but “alpha, beta, gamma“, which I presume do the same job, but they changed the names in the meantime…
Now we need to restore it on the other server we need to populate it with those files. So we need to ssh into the other server and then just scp them from the remote backup:
cd /
scp -r root@remote_ip:/var/cache/rsnapshot/alpha.0/localhost/* .
In other words, you copy “-r” (recursive) all the folders from the remote location “/var/cache/rsnapshot/alpha.0/localhost” authenticated with “root@remote_ip” (you’ll be asked for pass) to the current local path (which is the root /)
So all the backup files will be just poured in the exact respective folders on the local server, which should do the trick.
This is a fully custom approach to add a custom sidebar in your Woocommerce template in pure PHP code, no plugins or other stuff like that.
So first, we need to register a new sidebar, which is done in our theme. Usually, the way is highly recommended, you should have a child theme in your WordPress website, which (as most people know) allows your own customisations without impeding the main theme code. The biggest advantage is obviously that when the main theme is updated, you don’t lose any of your custom code.
Based on that, to add a new sidebar we will add a bit of code in our functions.php file, which should live in your child theme directory.
//We need a custom sidebar only for the Shop pages
function my_theme_widgets_init() {
  register_sidebar( array(
    'name'          => __( 'Shop Sidebar', 'my_theme' ),
    'id'            => 'sidebar-shop',
    'description' => __( 'The main sidebar appears on the left of the Shop page', 'my_theme' ),
    'before_widget' => '<aside id="%1$s" class="widget %2$s">',
    'after_widget'  => '</aside>',
    'before_title'  => '<h3 class="widget-title">',
    'after_title'   => '</h3>',
  ) );
}
add_action( 'widgets_init', 'my_theme_widgets_init' );
In there, replace “my_theme” with your theme name/slug.
After that, when you go to you WP admin, under the Customize > Widgets area, you should already see your new sidebar listed with the above name. You can add a few widgets, just to have something populated.
Adding the sidebar to the Woocommerce template
Now, to add it to the actual Woocommerce template it’s a bit more complicated, as each theme has its own compatibility with Woo. Some of them already have implemented some sidebar support, some not.
In this case we will exclude all of that and will consider the main theme doesn’t have any Woo sidebar support.
So the way Woo templating works is that you can overwrite the templating functionality by copying the default Woo template files from the /plugins/woocommerce folder to your own child theme, in the {your_childe_theme}/woocommerce folder
Now, the exact template file that deals with the main products listing page is \wp-content\themes\{your_childe_theme}\woocommerce\archive-product.php
In there the code adds some HTML wraper tags and then loops through the Woo products a lists them in their specific tags as well.
In order to add the sidebar, I used a great helper – Bootstrap – which was already included in the main theme that the website happened to use – Generatepress – but if your theme doesn’t have it, it can be easily added to your WordPress as an external library.
Now, to take advantage of the BS, we use its classes that organize the layout into 2 columns, one smaller to the left (the sidebar) and the other wider to the right (the products). The classes are “col-2” and “col-10” and the code we add, just after the “</header>” is:
Note 1: that at the end, after “woocommerce_product_loop_end();” we need to close the Bootstrap columns tags with ‘</div></div>’
Note 2: You can style anything in there with your own child theme custom CSS that again most of you know how to use. If not, here is a guide.
The template we altered is valid for the main product listing, but when you click on a product you go to an individual product page, which has another template. That one needs to be customised as well with the sidebar. This is its corresponding template that needs to be copied into your child theme: wp-content\themes\{your_theme}\woocommerce\single-product.php
Now when you go to your site main shop page (usually www.yoursite.com/shop/) you should see your new sidebar with whatever widgets contact you chose in the admin. You can continue to add more widgets and see them refresh instantly.
Happy coding and let me know if this helped or ask any other questions.
As a Romanian living in the United Kingdom for some years and with a curious journalist’s blood running through my veins, I have always been interested in the implications of Romanian culture in various aspects of British life.
We are well aware that Romanians have gradually become the second-largest nationality in England over the past few years. According to official statistics (though somewhat variable), there are approximately 500,000 Romanians in England, but many sources confirm that we are actually over a million strong in the Anglo-Saxon territory. What’s curious is that, despite facing one of the toughest barriers set by the British – Brexit – it seems that the initial wave of Romanians returning home (mainly out of fear and uncertainty) was not very significant, and as such, the number of our compatriots has not substantially diminished.
Nevertheless, it’s interesting that, based on the aforementioned fact, we can extrapolate and imagine the thought process of politicians and luminaries in the country’s leadership who have attempted various programs and actions over time to integrate Romanians into British society.
Obviously, despite these efforts, as is known for various reasons, a large majority of Romanian immigrants still speak very little English…
So, the British bigwigs shrugged their shoulders and scratched their heads, wondering what else they could do… And as we know, one of the most enterprising nations in the world, they thought of another solution.
For this, it seems evident to me that they took after their old and wise proverb “If you can’t beat them, join them” and thought it was time to adapt to our style…
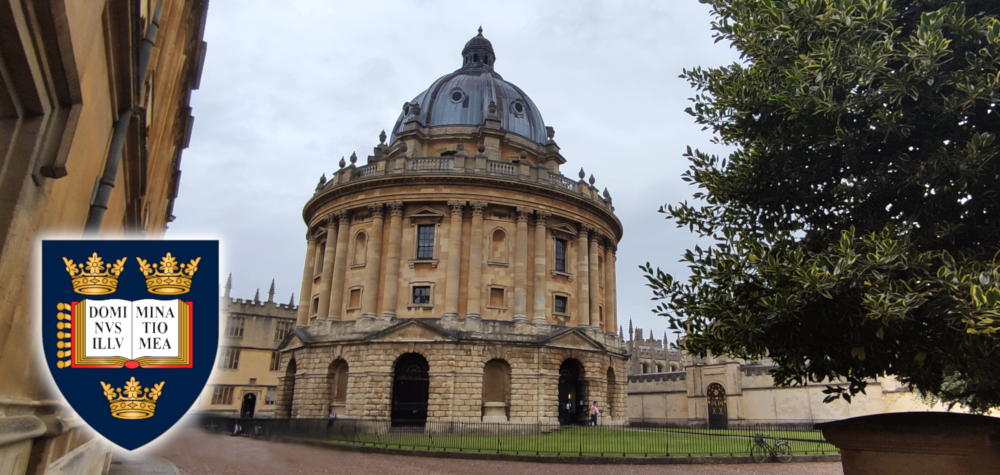
So, you can imagine my surprise when I recently discovered that the old and famous University of Oxford teaches none other than official Romanian language courses.
Now, I firmly believe it’s time to take a brief pause to realize the real importance of this fact, and I’ll briefly present (or remind you) of the magnitude of this institution.
The University of Oxford is the oldest university in the entire English-speaking territory (i.e., the entire old British Empire, or broadly speaking, the current Commonwealth) and the second-oldest university in the world. There is evidence that education began here as early as 1095.
The institution is one of the most prestigious in the world, with extraordinary prestige, especially in the fields of research, art, and archaeological discoveries. The University of Oxford is composed of many buildings with various educational purposes and has a total vast area, including the oldest museum in the world and the oldest university press in the world!!!
In fact, I recently visited there and all the buildings, through their superb architecture, and the museums, through the richness of the exhibits and the way they are organized, simply take your breath away. You are literally paralysed by the sight of the heights to which the human spirit can soar…
But getting back to our point, considering the vast scale of these institutions of the highest rank globally, to find out that the language of our homeland, spoken by all burned and torched by the fire of history, is taught in full courses at this university…, it gave me chills for some time…
Scouring through online information, I found that these courses were actually launched a few years ago and have since offered open access to the learning of our beautiful language to the general public.
The courses are offered within the Faculty of Linguistics, Philology, and Phonetics at the university and were started with major support from the Ministry of Education in Romania.
So obviously, being practical by nature, the English thought that in the end, it’s not a bad thing to please both parties, and I believe that over time they even started to like our ancestral language, as it seems that in recent years about a hundred students have enrolled in these courses.
I will try to return soon with more interesting information about everything related to these courses in another more detailed article.
The GIMP 2.10 shortcuts are all stored in a single file that sits in the GIMP user config folder, called “menurc“. In order to change them, you only need to replace that file.
An important note is that the previous GIMP versions have a different path, which I am not covering here because anyway I believe very few people, if any, are using them anyway.
In Windows 10, the path is: “C:\Users\{YourUserName}\AppData\Roaming\GIMP\2.10“.
The file that has the Photoshop shortcuts can be manually downloaded from here. Then you can just copy it to that folder with overwriting the existing one.
NOTE: The GIMP program needs to be closed before doing this.
————————————————————————————-
Alternatively, you can open a Powershell command/terminal and just paste this code line, which will automatically do all the job for you, including taking a backup of the original “menurc” file, just to be on the safe side:
cd $Env:UserProfile\AppData\Roaming\GIMP\2.10; mv menurc menurc_bck; iwr -outf menurc https://www.webcreative.me/wp-content/uploads/menurc
Step 2. I downloaded another external explorer – https://explorerplusplus.com/ – the 64-bit version – and this launched well after booting.
Step 3. Unzip it and copy that folder to the mounted WinPE folder – C:\WinPE_amd64\mount – I just pasted it in the root, next to “Program Files, Windows, etc”.
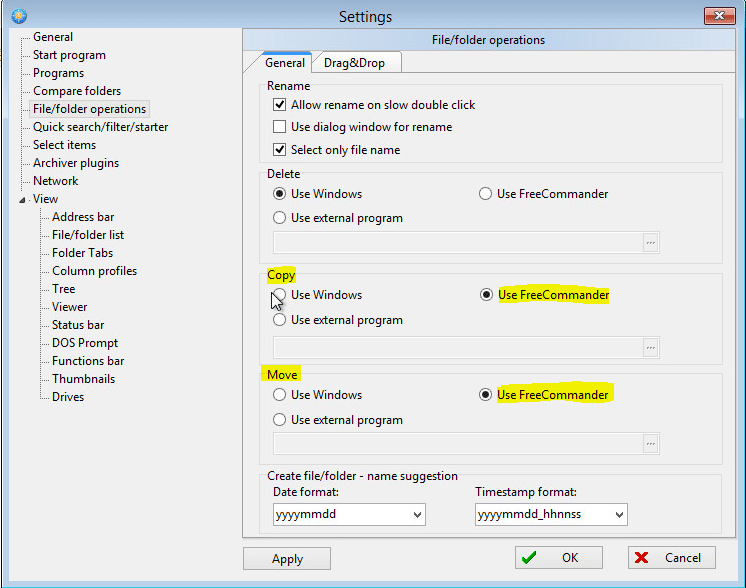
Step 4. You have to go in and tell FreeCommander that you want it to be the master of Deletes, Copies, or Moves, however, once you do this it is persistent throughout your PE session. I opened it from the mounted folder and changed those settings, then Appy, OK, then closed the program.
Step 5. Unmount the image and commit the PE environment:
C:\Program Files (x86)\Windows Kits\10\Assessment and Deployment Kit\Deployment Tools>
Dism /Unmount-Image /MountDir:"C:\WinPE_amd64\mount" /commit

Deployment Image Servicing and Management tool
Version: 10.0.17763.1

Saving image
[==========================100.0%==========================]
Unmounting image
[==========================100.0%==========================]
The operation completed successfully.
Step 6. Save/Write the image on the USB stick. MAKE SURE you type the correct drive letter for the USB stick (best to check it in Explorer):
C:\Program Files (x86)\Windows Kits\10\Assessment and Deployment Kit\Deployment Tools>MakeWinPEMedia /UFD C:\WinPE_amd64 D:
WARNING, ALL DATA ON DISK DRIVE D: WILL BE LOST!
Proceed with Format [Y,N]?Y
Formatting D:...

Setting the boot code on D:...

Copying files to D:...

Success
Step 7. Done. You should EJECT the USB stick from the tray icon option, then unplug it an you can boot from it.
In Blender’s Video Sequence Editor, sometimes in the preview sequencer area (otherwise known as the Timeline), the strips’ height is very big, making it hard to navigate and to see things around. This happened randomly once and another time when I upgraded Blender to a new version.
I find this issue very annoying personally, so I was wondering if there’s a way to make the strips thinner and I research about it.
It turns out that there’s actually an easy way to customise the height of those strips straight from the sequencer area visual interface, as they say in this Blender post: https://developer.blender.org/T91724
So, in the VSE timeline/sequencer, you’ve got the right bar that has the 2 dots top-bottom.
There you can drag those dots and the whole “perspective” changes, which changes the strips’ height with it:
WordPress has an extremely flexible structure, but sometimes it lacks some very fine options that one might need for some situations…
This should work for any theme, but we are going to do it for the popular Understrap theme.
The requirement is to have a sidebar for the Woocommerce main shop page that is different from the default WP one. At the moment, if you want to add specific widgets only on the Shop page, you can’t as it uses the main WP post one.