Firstly, we need to create the WinPE disk itself.
A good documentation from Microsoft about creating bootable Windows PE media: https://docs.microsoft.com/en-us/windows-hardware/manufacture/desktop/winpe-create-usb-bootable-drive?view=windows-10
Another website that instructs how to add the File Explorer to the image we already created: https://www.virtualizationhowto.com/2015/03/add-gui-file-explorer-windows-pe-environment/
Step 1. Firstly, we need to mount the image. This is done in the Deployment and Imaging Tools Environment started as an administrator.
C:\Program Files (x86)\Windows Kits\10\Assessment and Deployment Kit\Deployment Tools>
Dism /Mount-Image /ImageFile:"C:\WinPE_amd64\media\sources\boot.wim" /index:1 /MountDir:"C:\WinPE_amd64\mount"

Deployment Image Servicing and Management tool
Version: 10.0.17763.1

Mounting image
[==========================100.0%==========================]
The operation completed successfully.
( This didn’t work!!! –> Step 2. Download the Freecommander (the 32-bit version – FreeCommanderXE-32-public_portable.zip) )
Step 2. I downloaded another external explorer – https://explorerplusplus.com/ – the 64-bit version – and this launched well after booting.
Step 3. Unzip it and copy that folder to the mounted WinPE folder – C:\WinPE_amd64\mount – I just pasted it in the root, next to “Program Files, Windows, etc”.
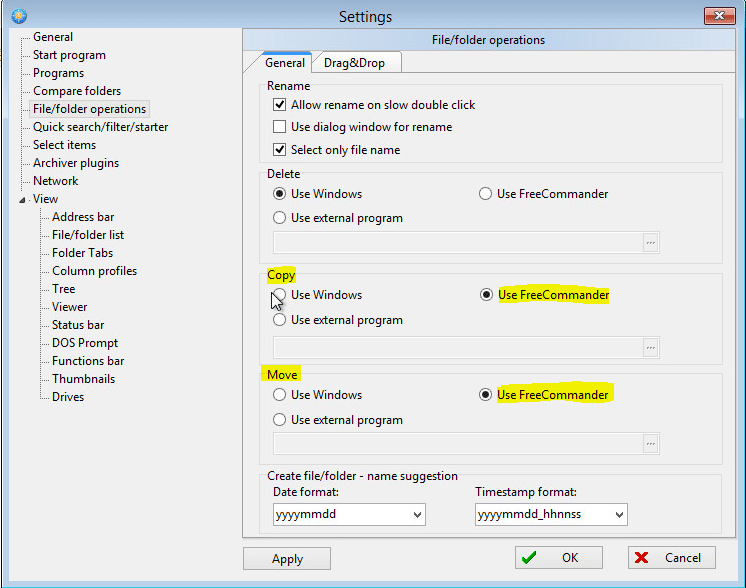
Step 4. You have to go in and tell FreeCommander that you want it to be the master of Deletes, Copies, or Moves, however, once you do this it is persistent throughout your PE session. I opened it from the mounted folder and changed those settings, then Appy, OK, then closed the program.
Step 5. Unmount the image and commit the PE environment:
C:\Program Files (x86)\Windows Kits\10\Assessment and Deployment Kit\Deployment Tools>
Dism /Unmount-Image /MountDir:"C:\WinPE_amd64\mount" /commit

Deployment Image Servicing and Management tool
Version: 10.0.17763.1

Saving image
[==========================100.0%==========================]
Unmounting image
[==========================100.0%==========================]
The operation completed successfully.
Step 6. Save/Write the image on the USB stick. MAKE SURE you type the correct drive letter for the USB stick (best to check it in Explorer):
C:\Program Files (x86)\Windows Kits\10\Assessment and Deployment Kit\Deployment Tools>MakeWinPEMedia /UFD C:\WinPE_amd64 D:
WARNING, ALL DATA ON DISK DRIVE D: WILL BE LOST!
Proceed with Format [Y,N]?Y
Formatting D:...

Setting the boot code on D:...

Copying files to D:...

Success
Step 7. Done. You should EJECT the USB stick from the tray icon option, then unplug it an you can boot from it.
